The 16 best new iOS 11 features – and how to use them
Use your iPhone and iPad like a pro, whether editing Live Photos or becoming a master of multitasking
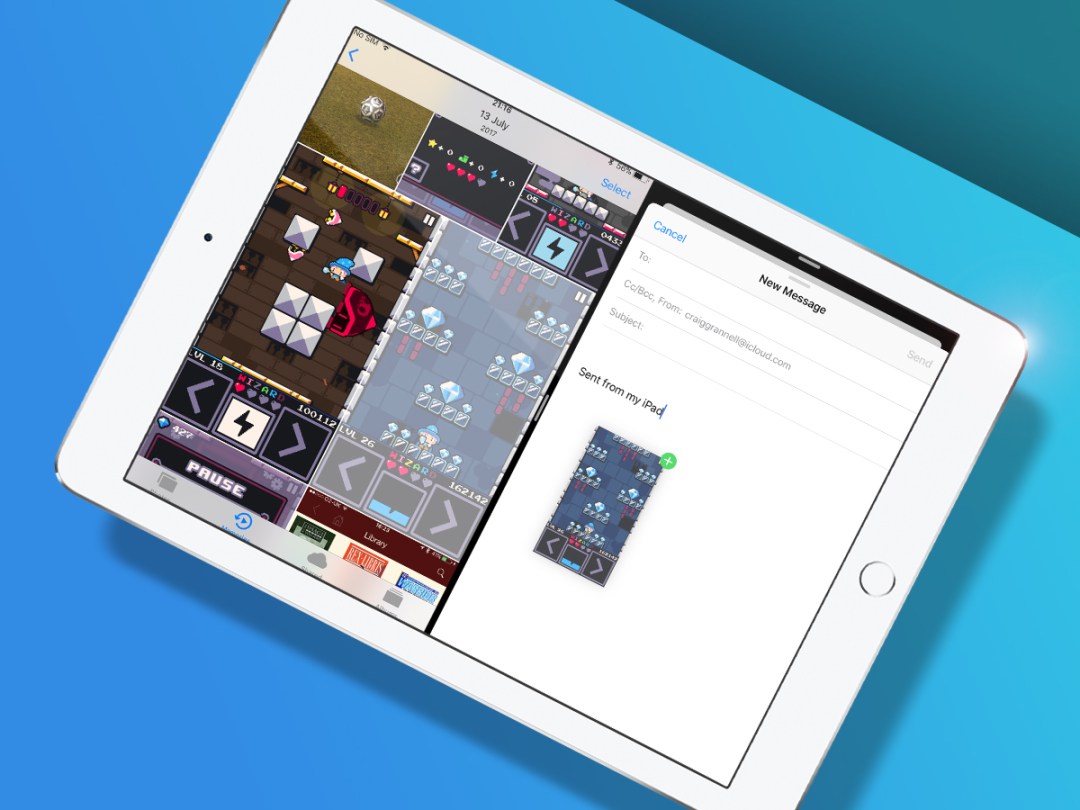
When iOS 11 was announced, we suggested it would make iPad awesome all over again. But the truth is it’s a slice of awesome whatever iOS device you’re rocking.
On iPad, iOS 11 is Apple’s attempt to marry desktop power with iOS elegance – hence the Files app, drag and drop, and souped-up multitasking. But iPhone owners aren’t left in the lurch, because they get plenty of goodies, too.
So delve into our tips, and learn how to make your iPhone and iPad do more.
1) Use drag and drop
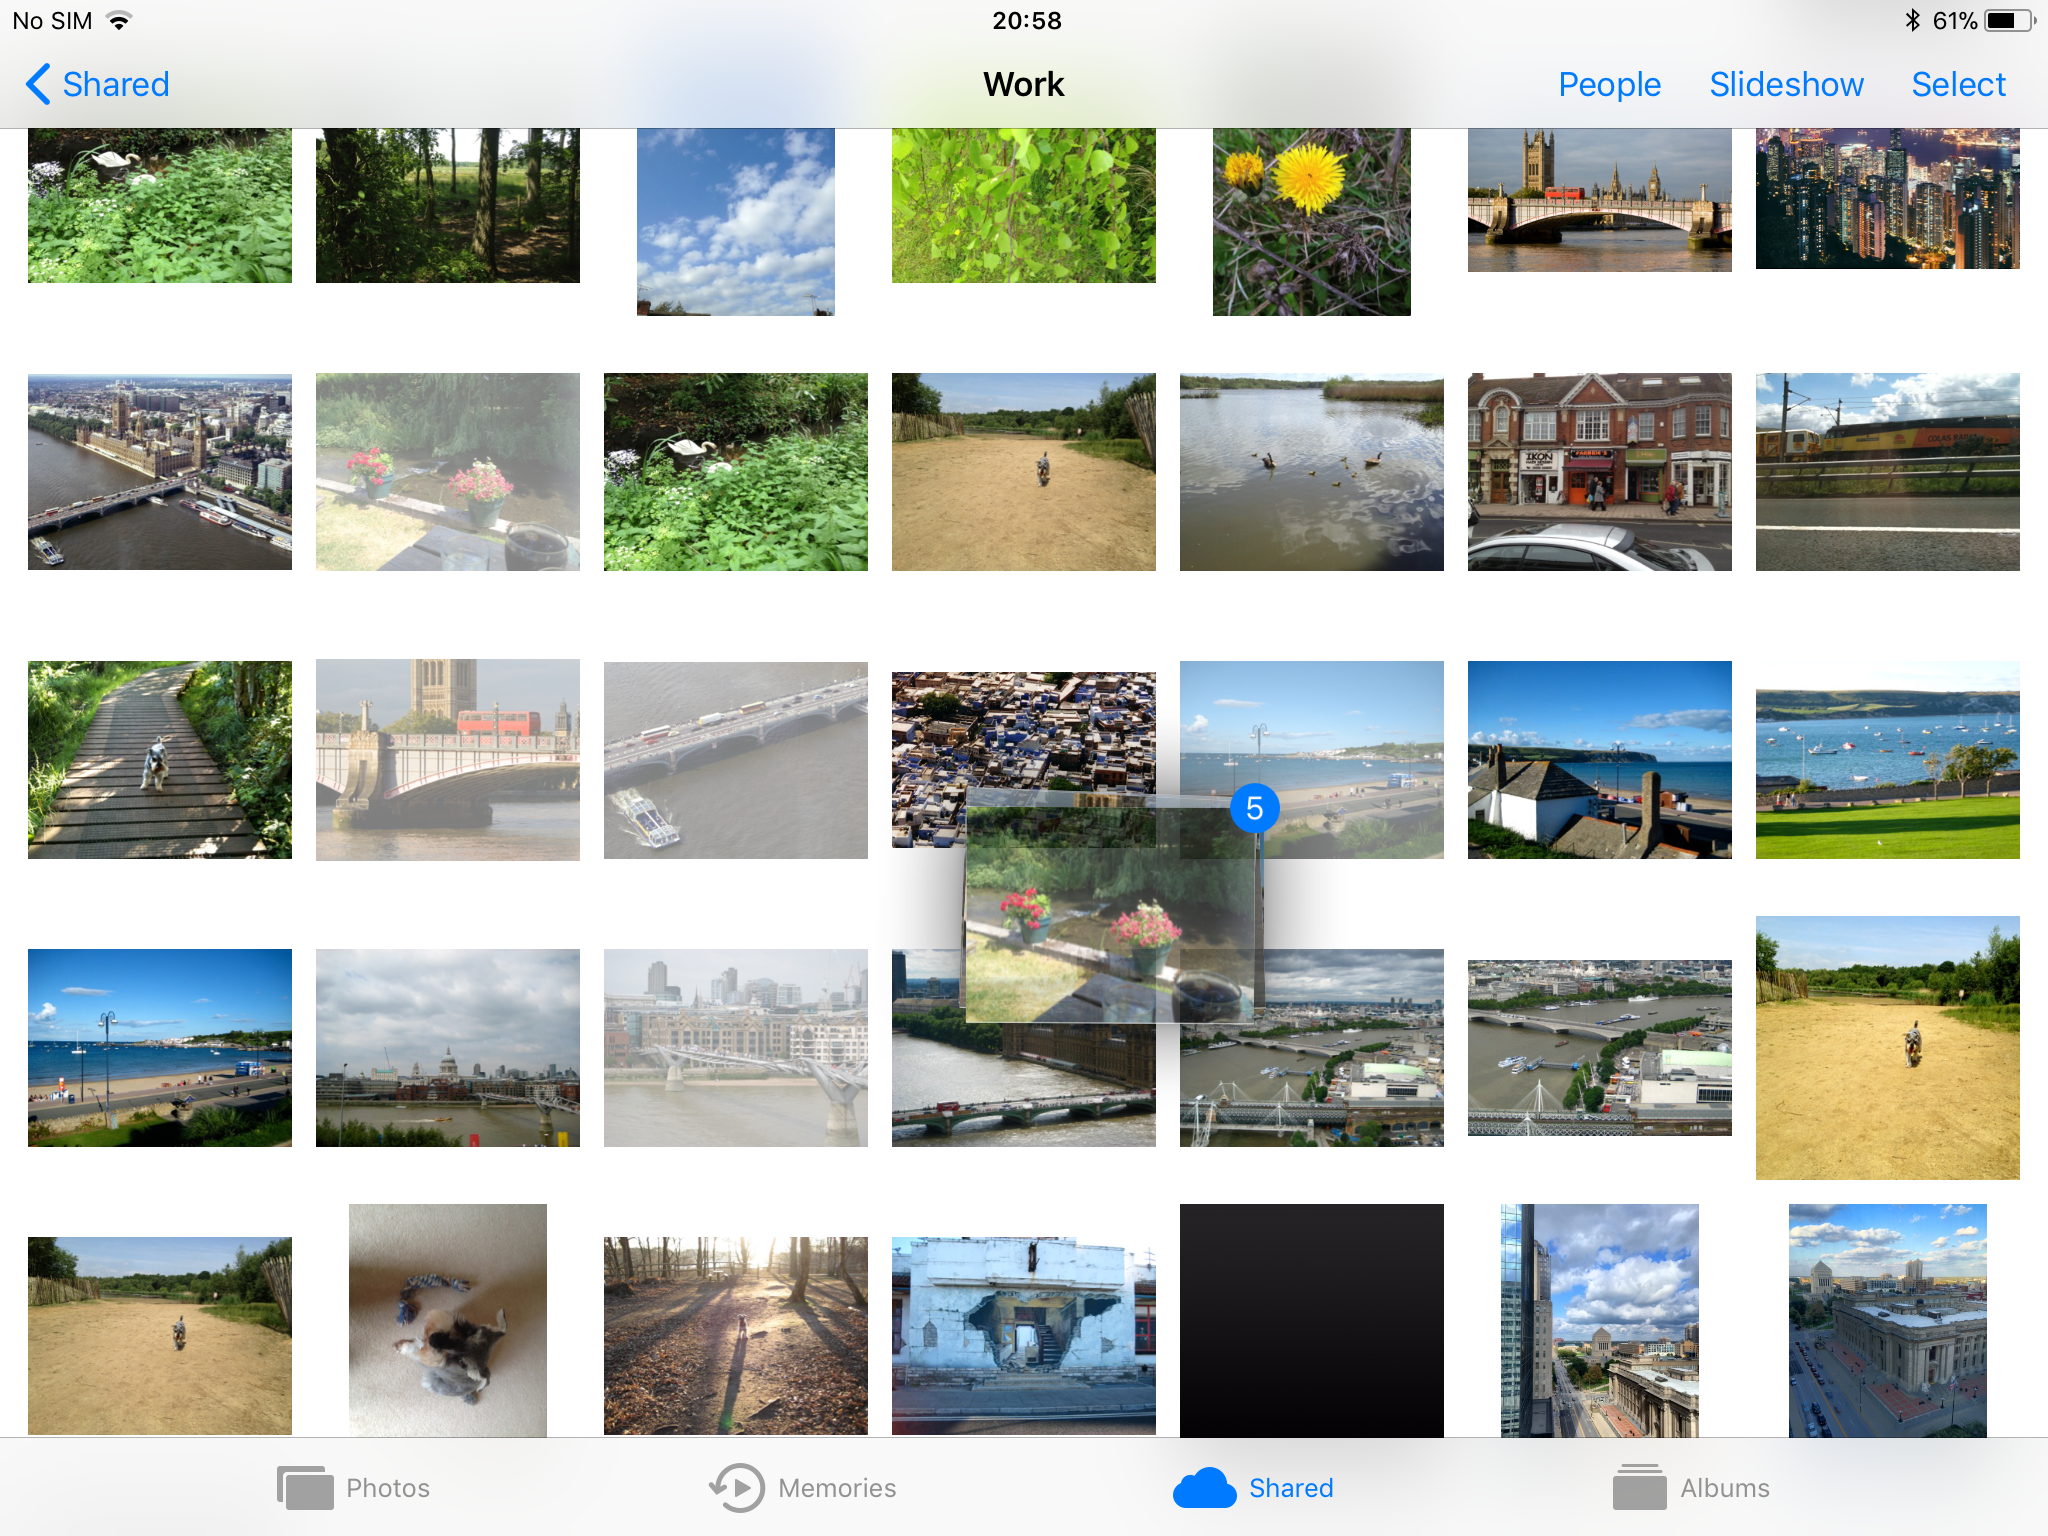
On iPad, iOS 11 lets you drag and drop content – whether text, images or URLs – between apps. Start by tap-holding the content. In Split View, drag over to the other app and lift your finger to drop the content. In full-screen, keep your selection held, double-click Home, and tap a thumbnail to open another app.
You can also add to a selection: for example, in Photos, drag a picture and then tap some more; or on the Home screen, tap-hold an app to make the icons jiggle, drag one, and tap some others. That last one’s good for hurling old 32-bit apps into a folder of the doomed.
2) Customise Control Centre
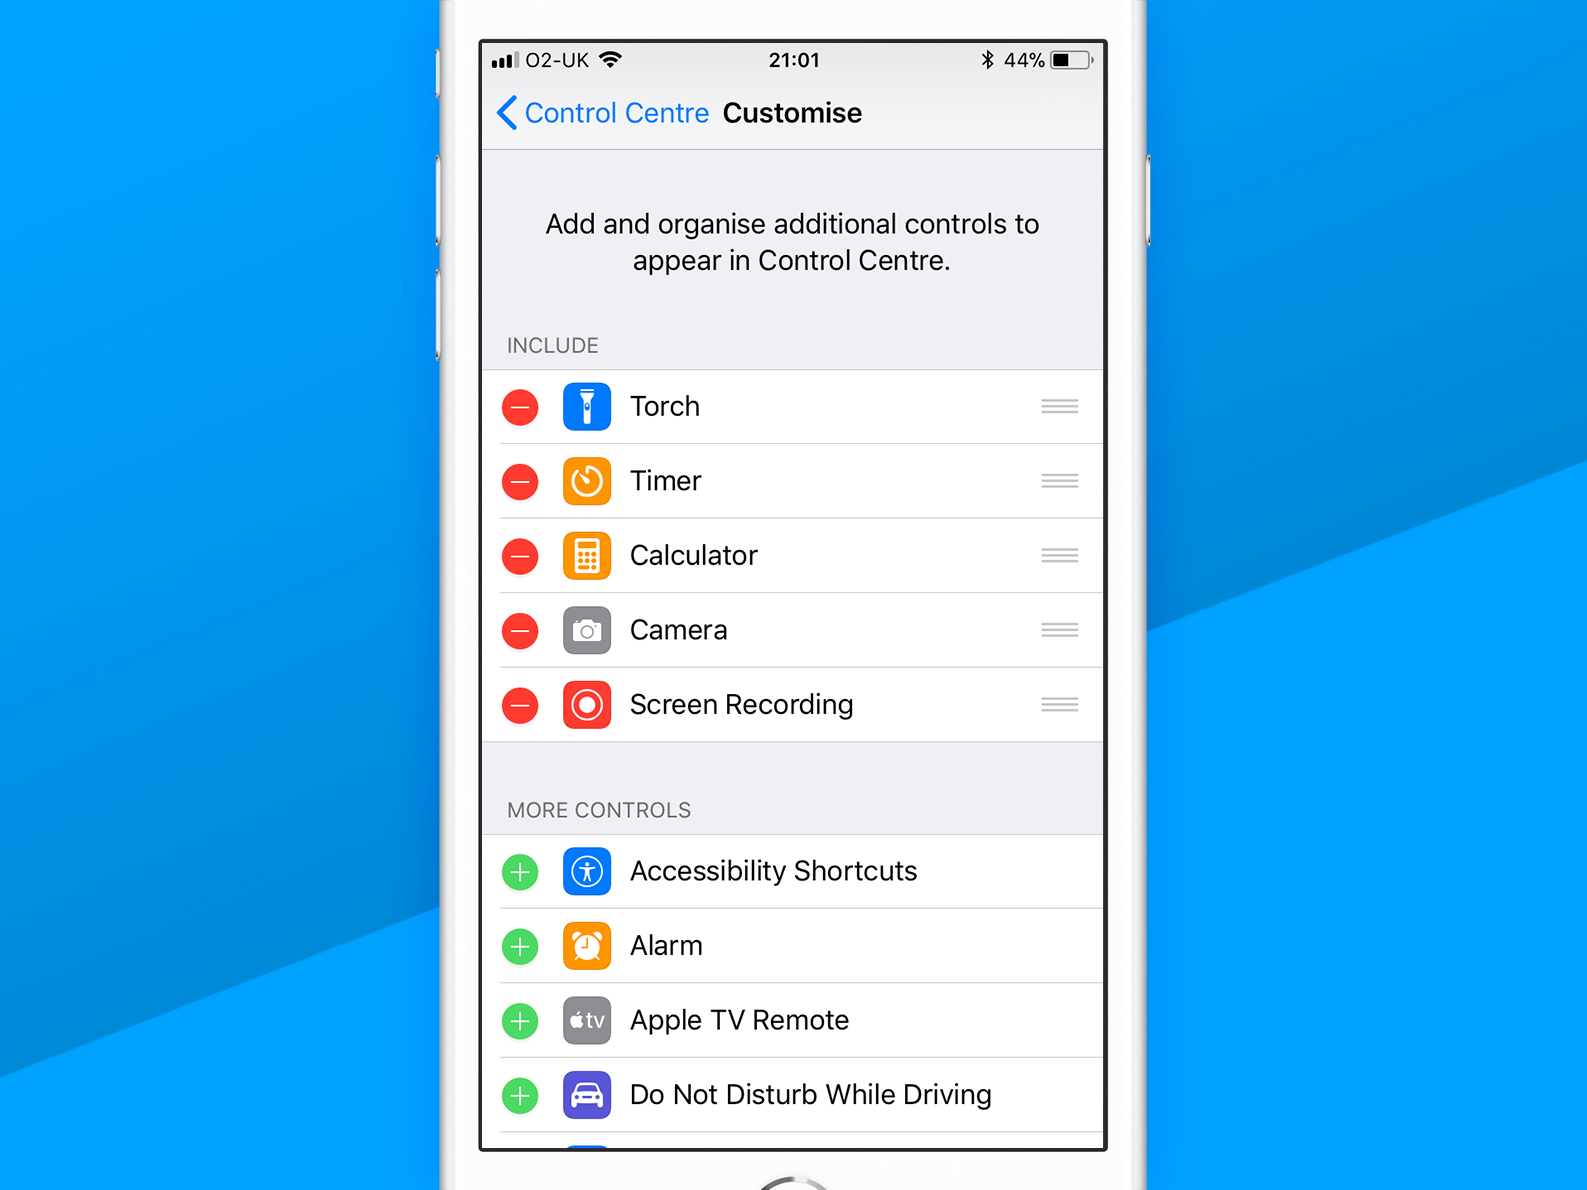
Control Centre‘s revamp groups controls, and pops-up more refined settings when you use 3D Touch on iPhone or tap-hold on iPad. (Sadly, there’s no option to quickly access specific Wi-Fi networks – argh!)
There’s a modicum of customisation on offer, in Settings. Go to Control Centre > Customise Controls. Love stopwatches but inexplicably hate timers? Good news: you can add the former and feverishly delete the latter – before quietly seeking help.
3) Save space
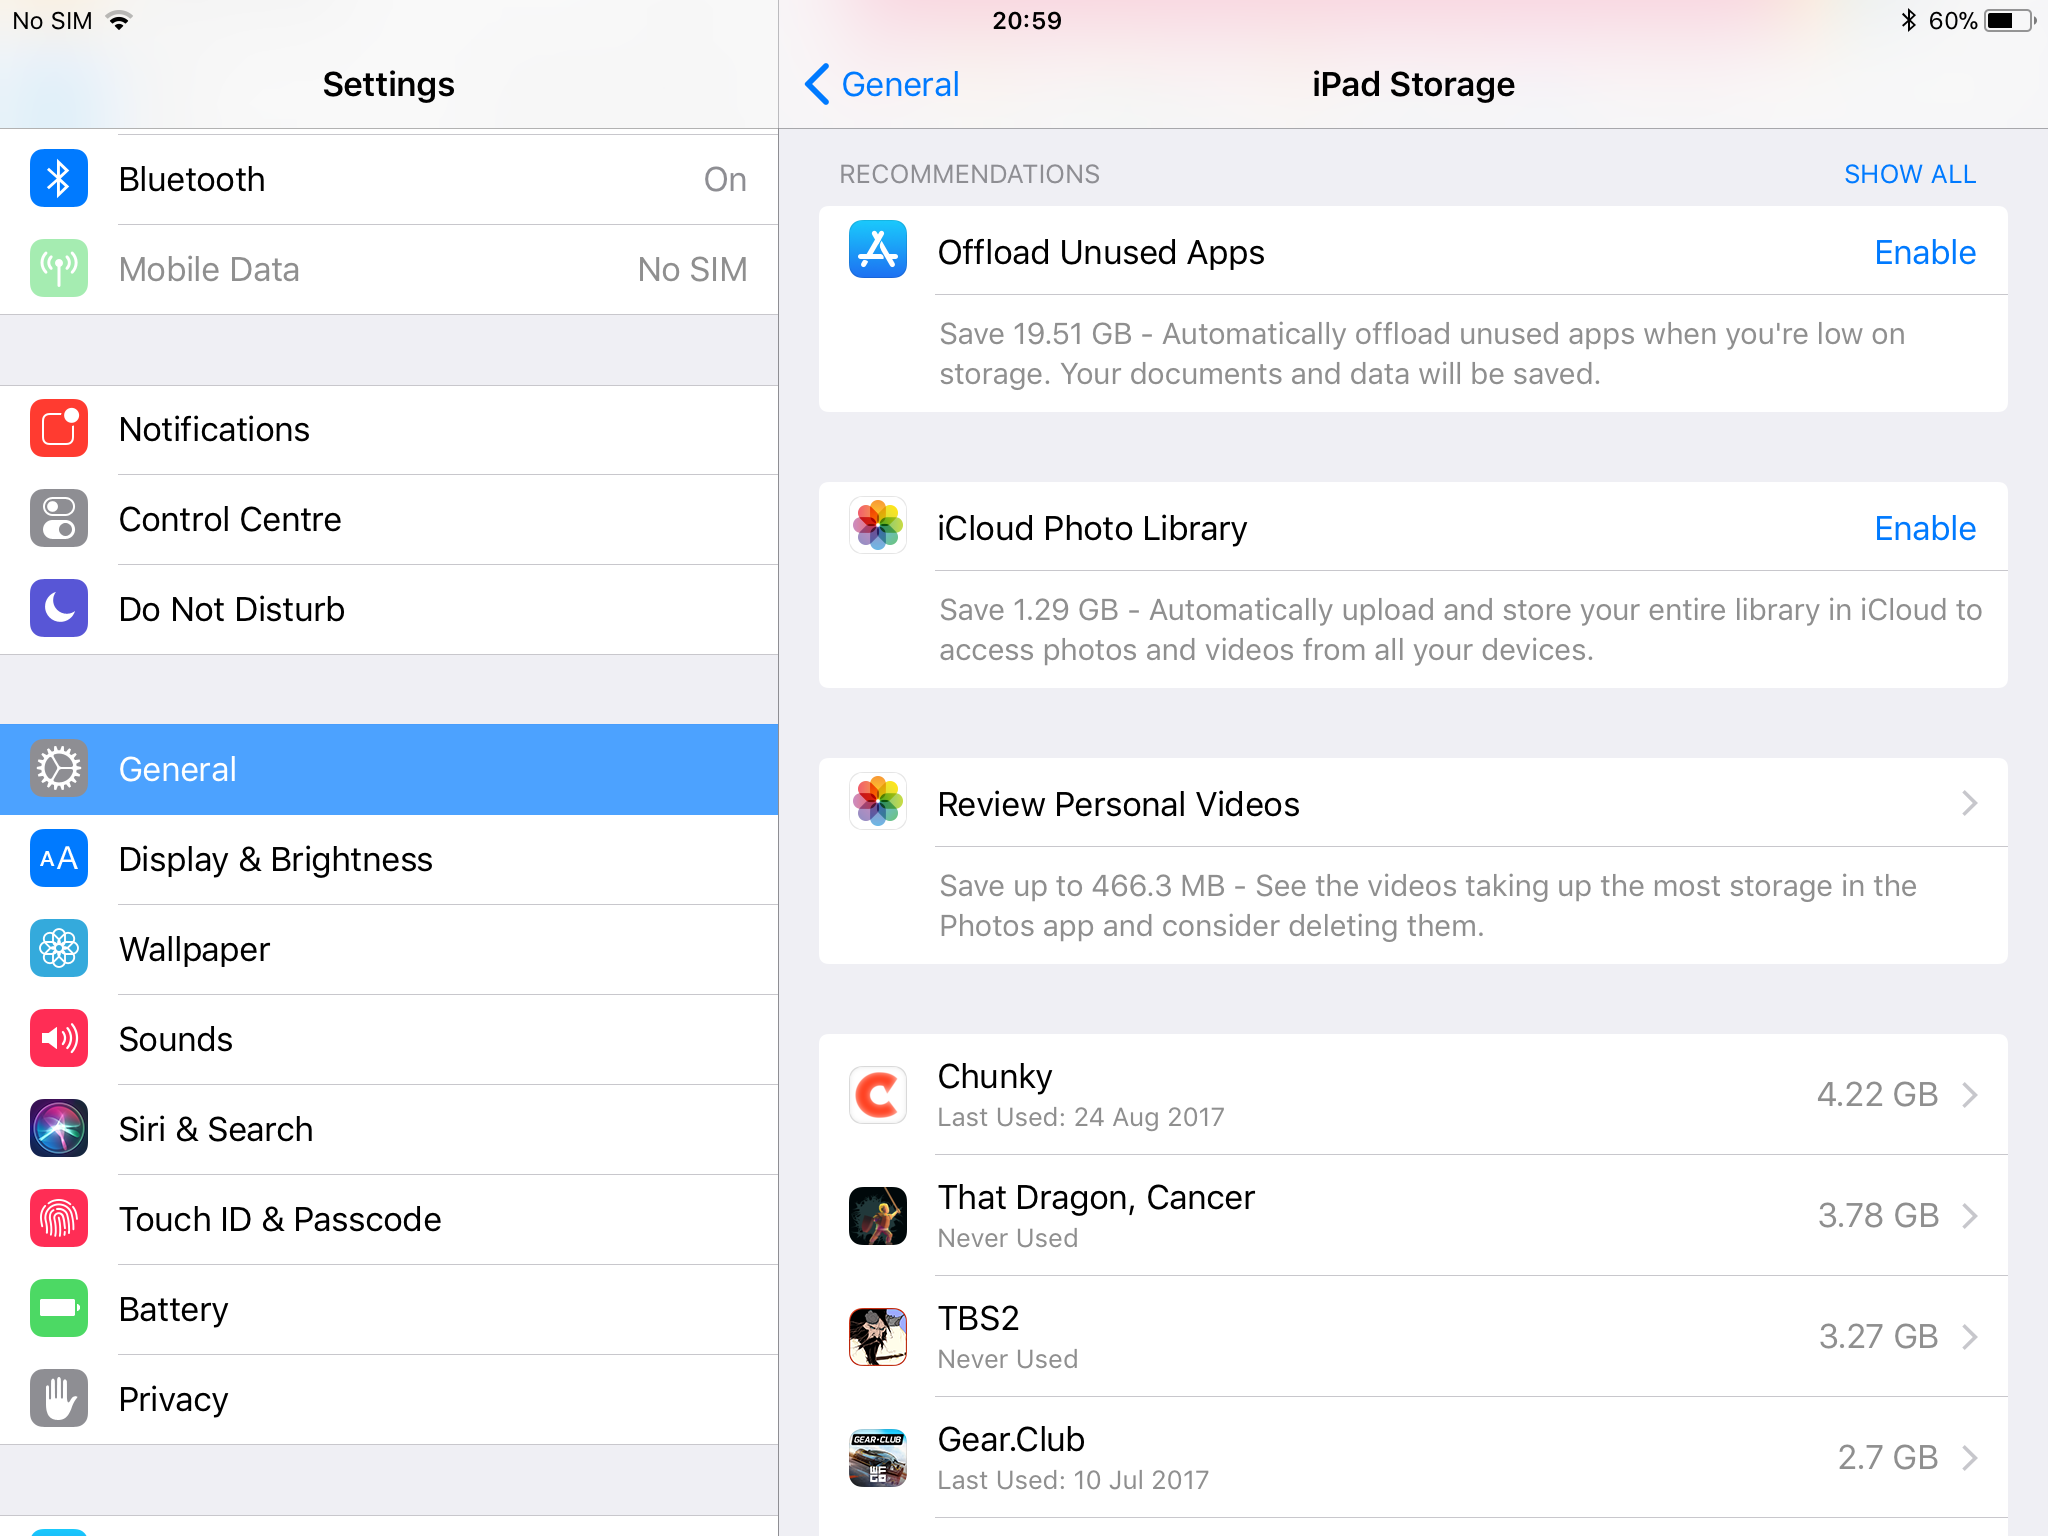
The snag with great games, 4K video, and more photos than your eyes can feasibly cope with, is your device fills to bursting. Fix this by heading to Settings, and then General > iPhone/iPad Storage.
Here, you can automatically offload unused apps, but retain their data upon reinstall – great for temporarily getting rid of games you’re not playing yet might (but let’s face it, probably won’t) finish in the future.
Alternatively, scroll down to offload apps on a one-off basis. More selective pruning’s available by tapping Messages (nuke huge attachments), Photos (review videos and fire up iCloud options), and Music (delete albums or entire artists).
4) Be safe while driving
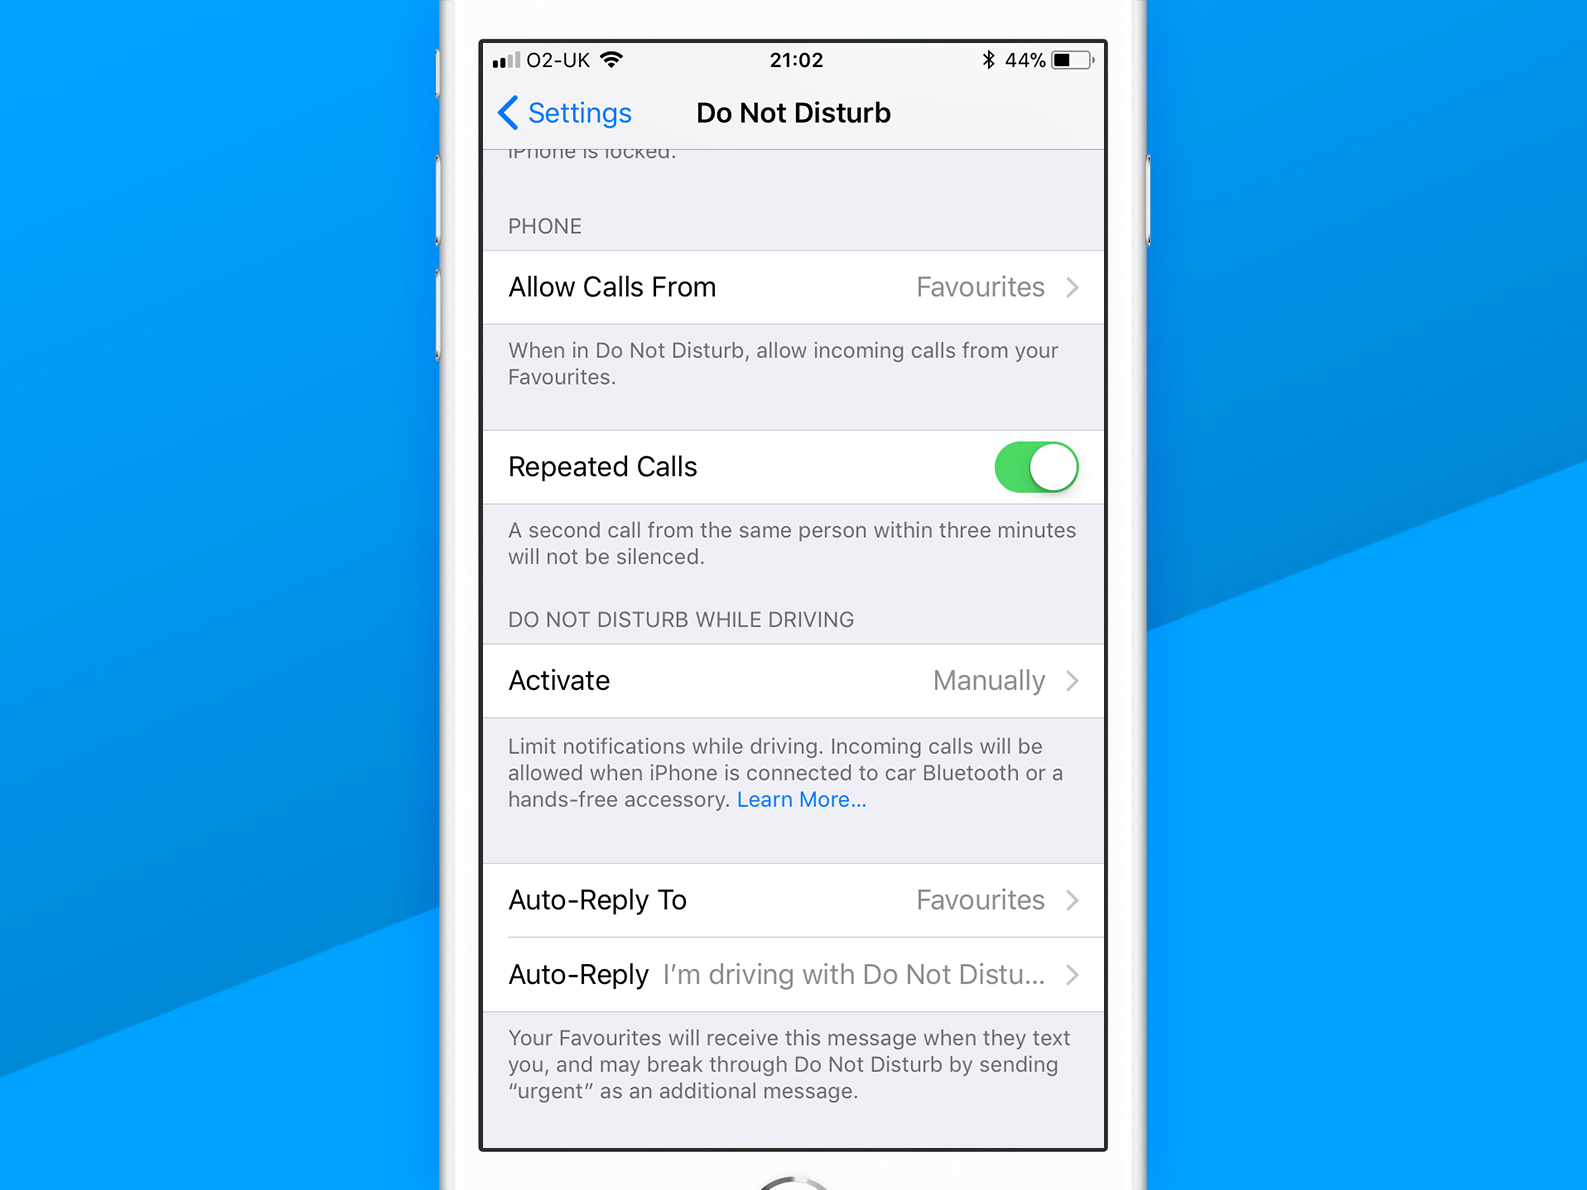
When belting along in the car, your iPhone wants you looking at the road. We noticed at the end of our first journey, it grumpily suggested turning on Do Not Disturb While Driving. Unfortunately, it sometimes does this while you’re a passenger – or on the train. And we assume most Stuff readers aren’t hijacking public transport to enact their Thomas the Tank Engine fantasies.
Fortunately, you can manually toggle this feature in the Do Not Disturb section of Settings (along with setting up auto-replies), and it can be added to Control Centre as a quick-access button.
5) Tame Siri
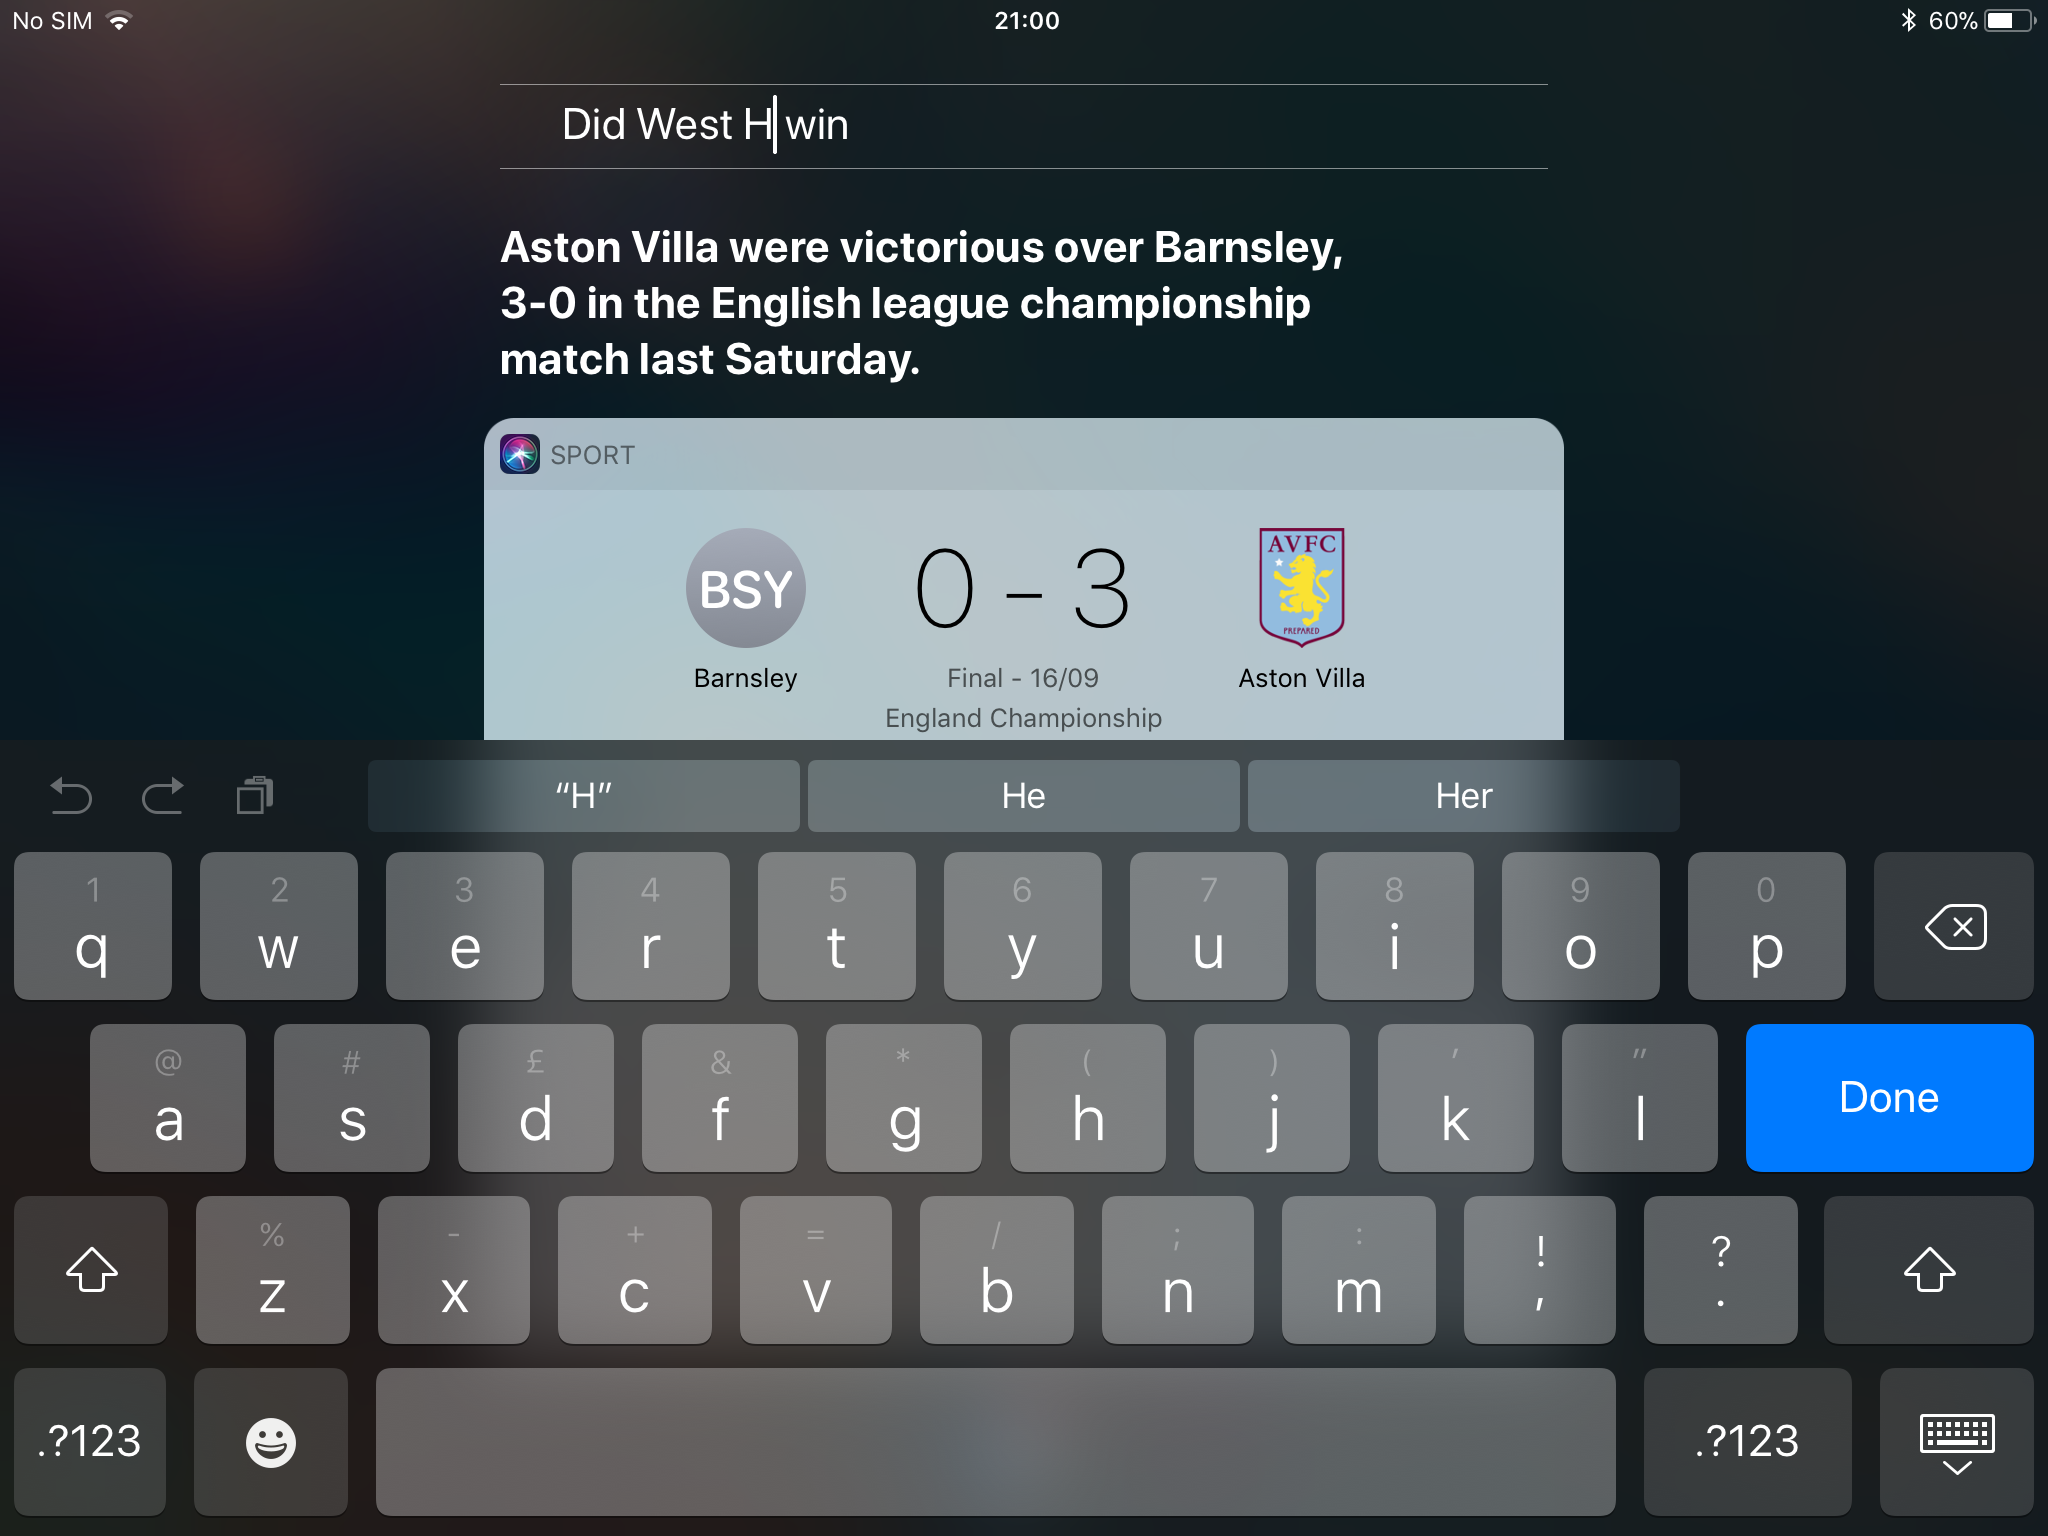
In iOS 11, Siri got smarter – you can now ask for translations, and local AI boosts the chances of Siri accurately doing what you ask. Now, though, you can do more than just talk.
In Settings, go to General > Accessibility > Siri, and you can turn on Type to Siri – although be aware this disables speech input. As a halfway house, you can edit your input by tapping on your original query – for example, switching West Ham for Aston Villa if you’re an ex-PM asking about footie results.
6) Invert colours
With iOS 10, Apple introduced Night Shift, which knocks some blue out of your screen late in the day, in theory to help you sleep better. The button for this is now found under Control Centre’s brightness slider when you tap-hold it.
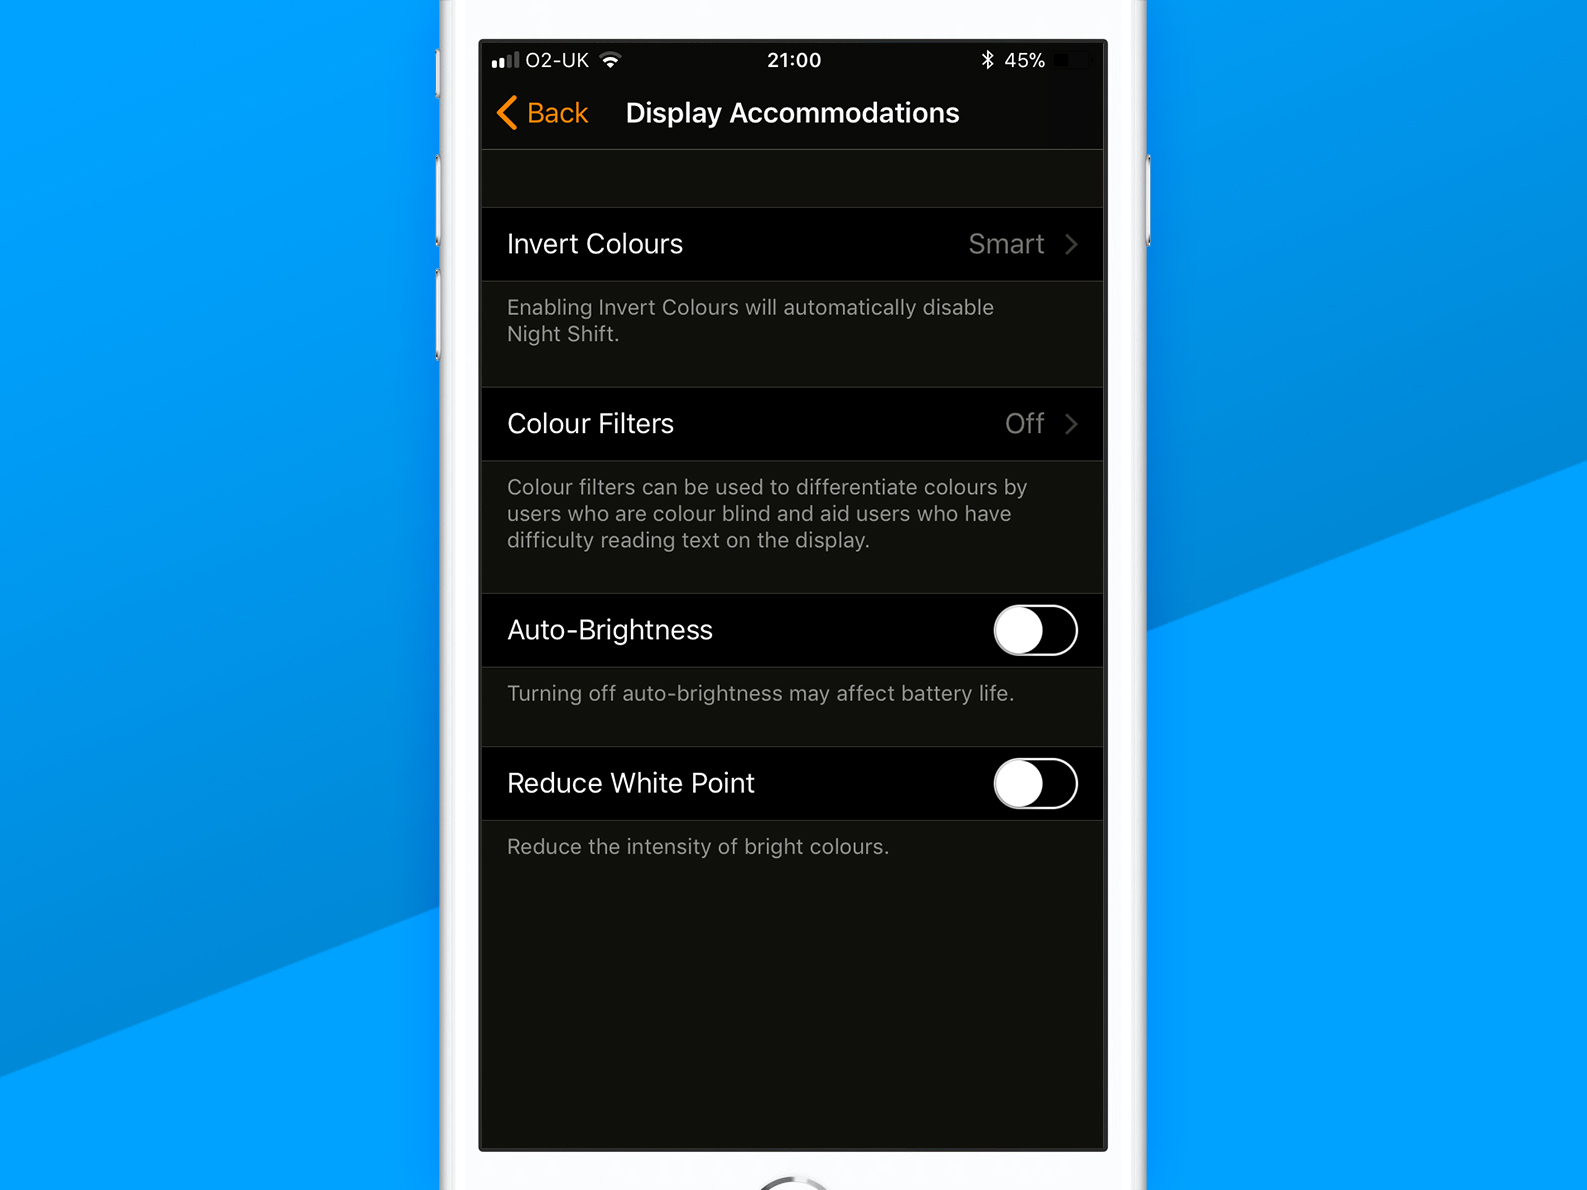
But go to Settings > General > Accessibility > Display Accommodations > Invert Colours, and you’ll find the new Smart Invert. This reverses your display’s colours, apart from images and media – a proper night mode, essentially – rather than the classic version, which turns your device into something seemingly coloured in by a crazy person.
7) Dock it
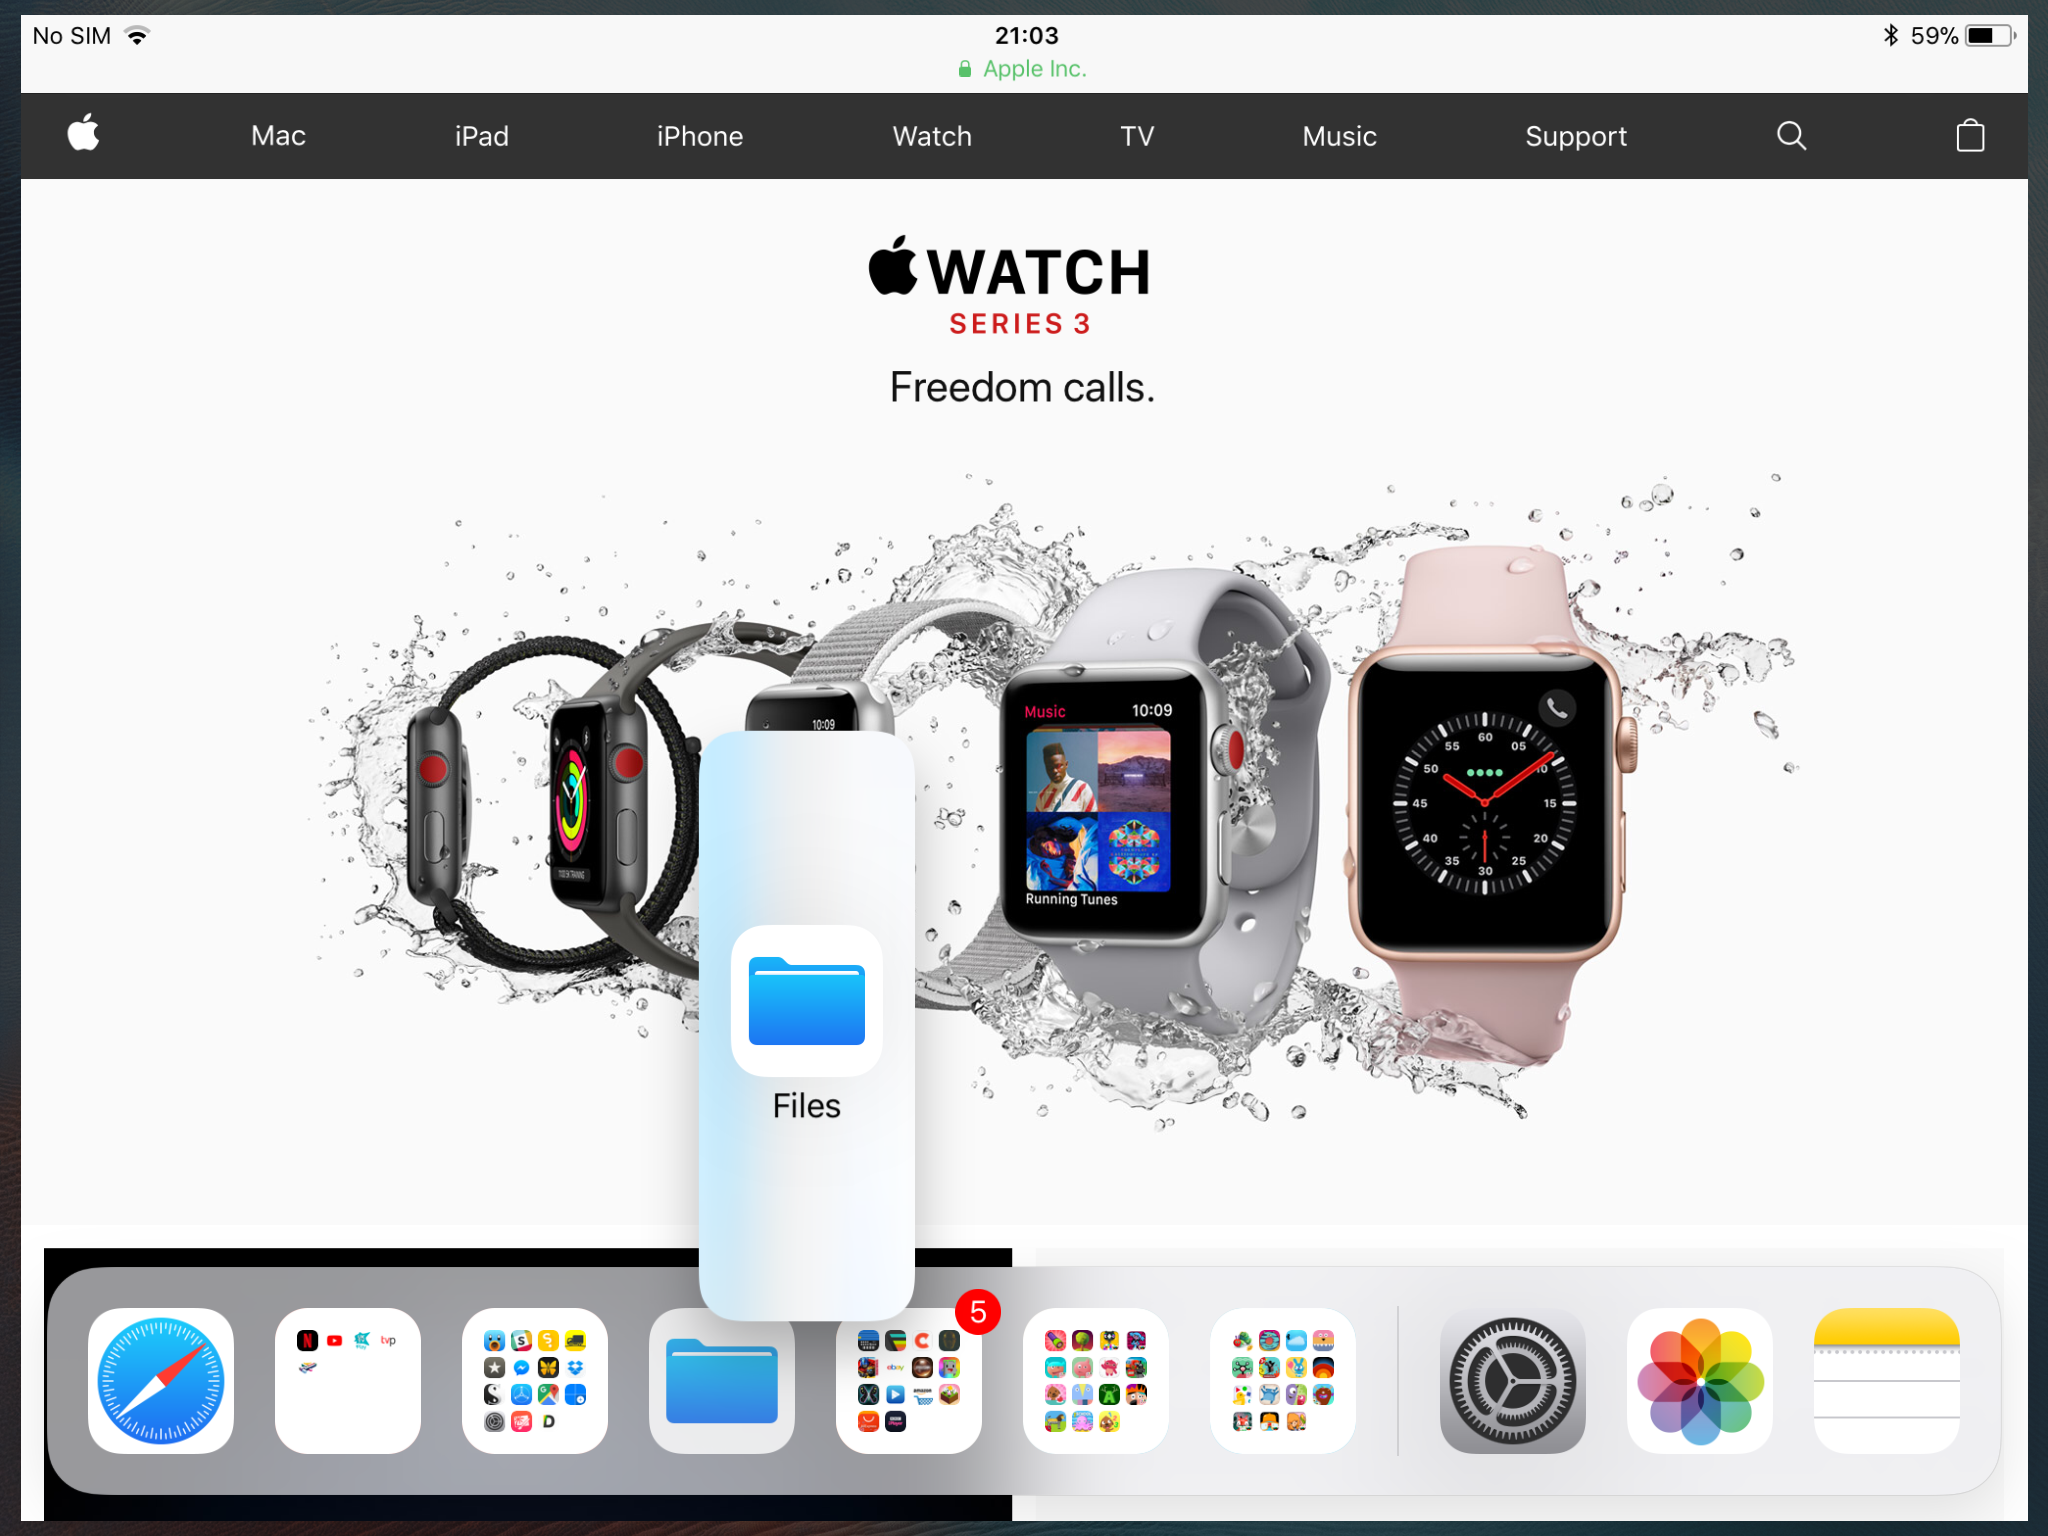
On iPad, you still stash icons and folders in the Dock, but now it holds over a dozen of the things. It also shows a few recently used apps on the right-hand side. Furthermore, a quick swipe up from the bottom of the screen makes the Dock put in an appearance whatever app you happen to be using.
You can then drag an app out of the Dock to perform a quick task inside a tiny window – or drag that window’s tab upwards to launch Split View. Window pairings can subsequently be accessed in the app switcher, invoked by double-clicking the Home button.
8) File documents
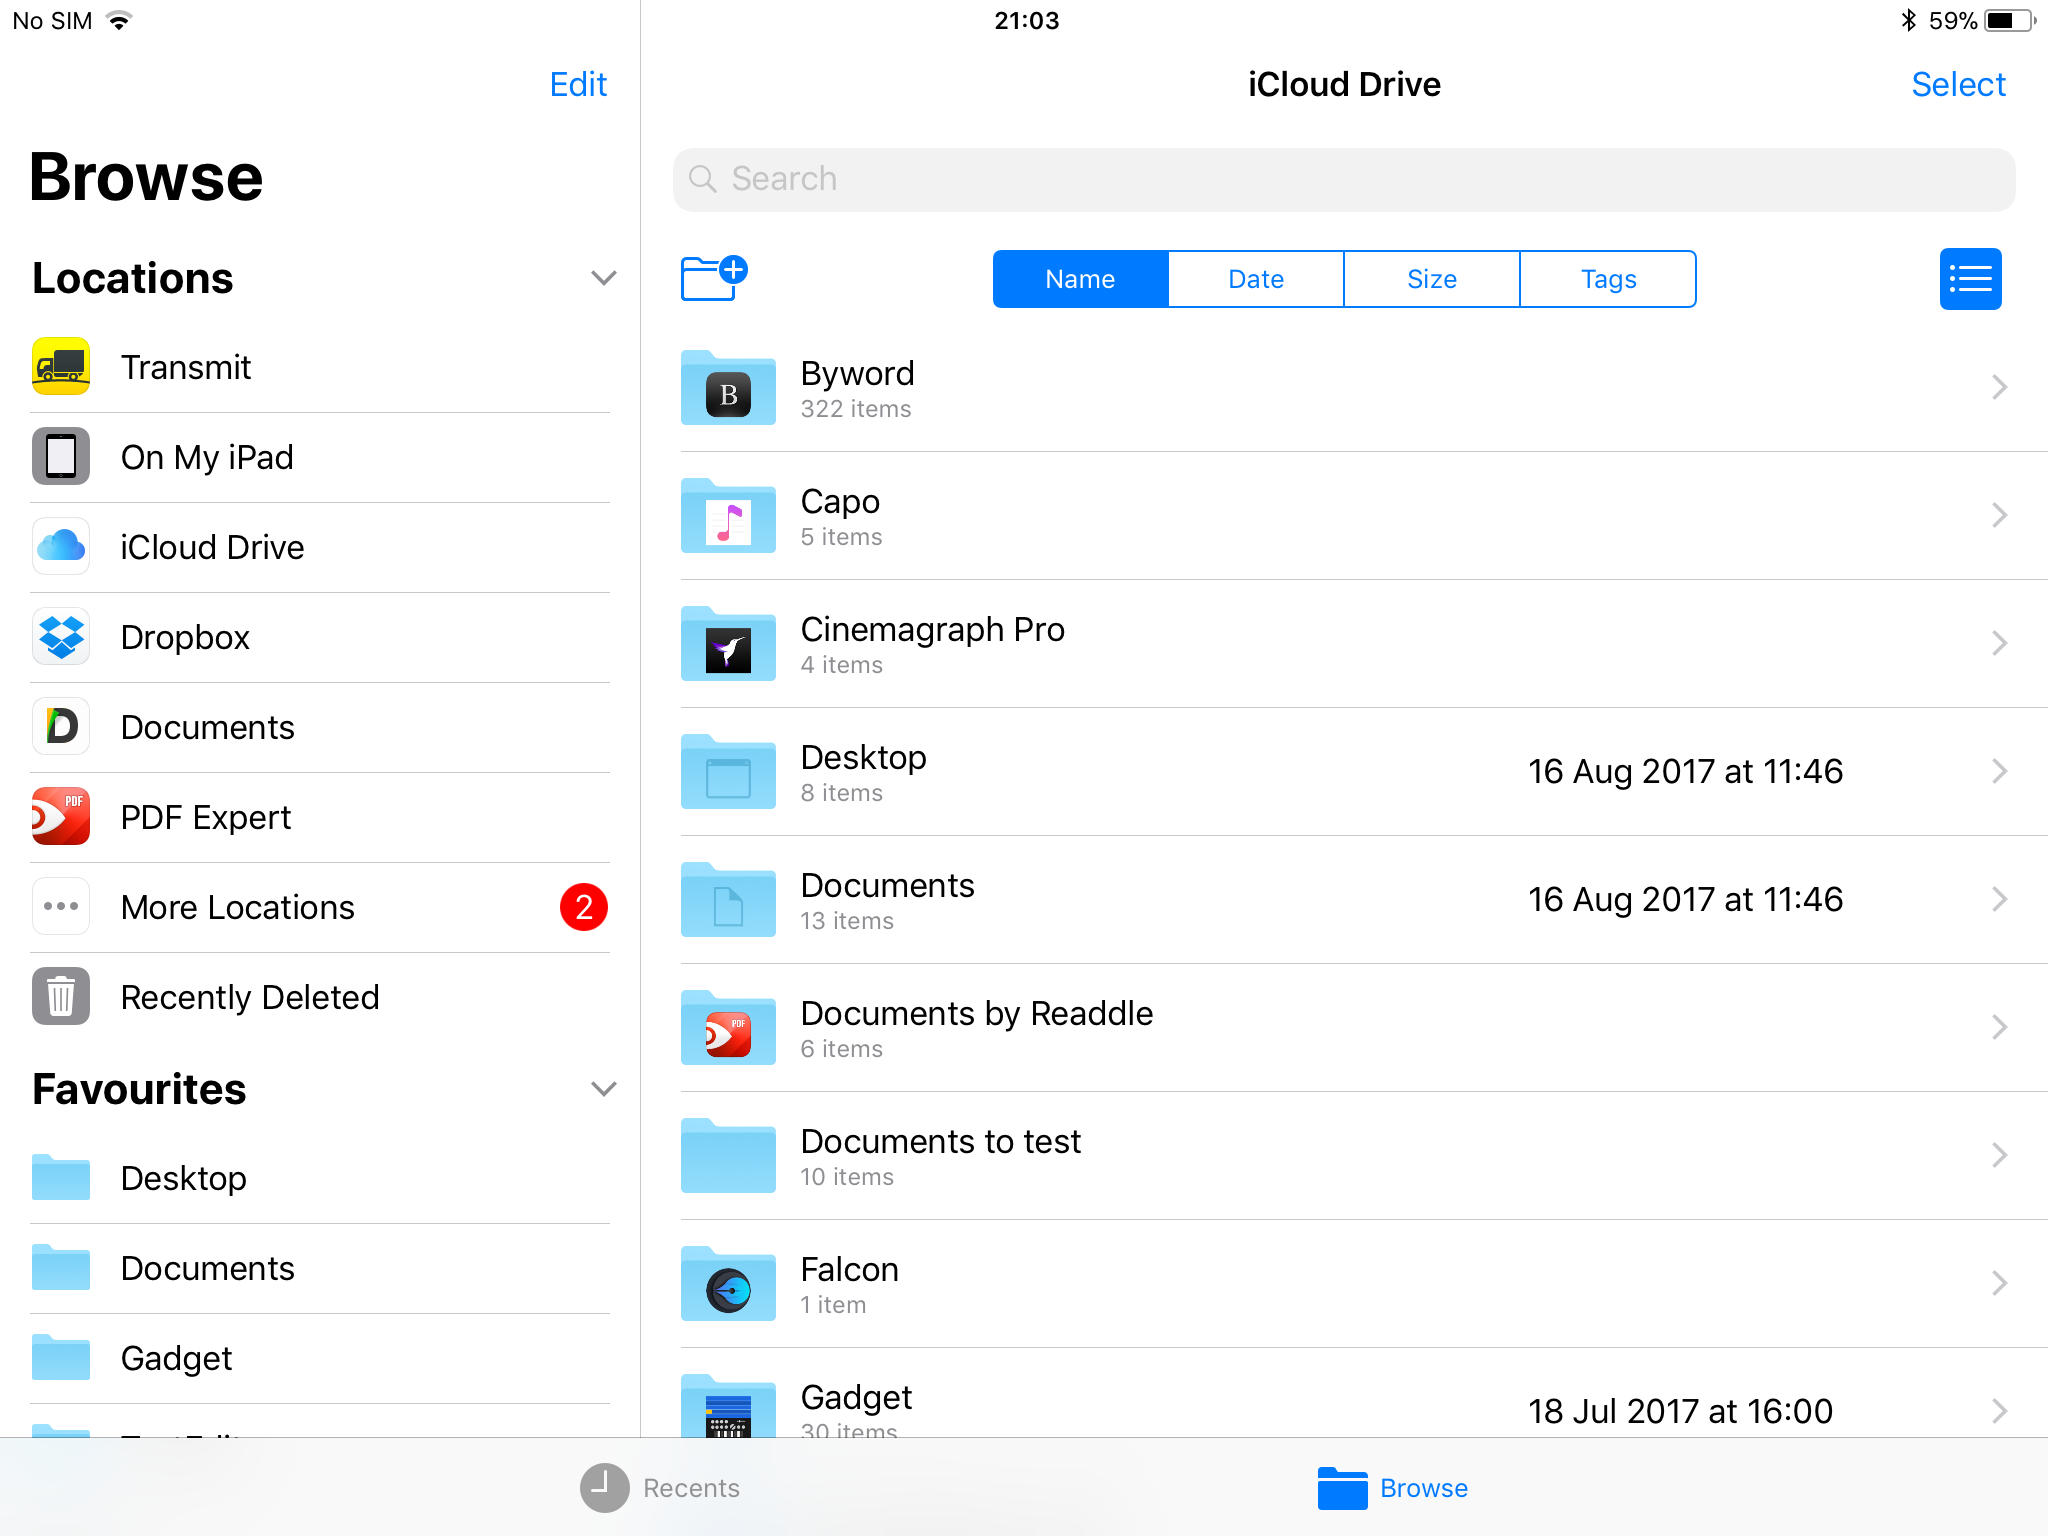
When iOS first arrived, Apple decided people didn’t need a traditional file system. People decided otherwise and started using Dropbox an awful lot. Apple relented with iCloud Drive, and now Files more or less turns that into a full-fledged Finder.
On iPad, Files is especially great: its two-pane view makes it a cinch to quickly browse and manage files on your device – and also elsewhere. Yep – in an atypical Apple move, you can add other ‘locations’ to the Files sidebar, including Dropbox and FTP client Transmit.
9) Pin notes
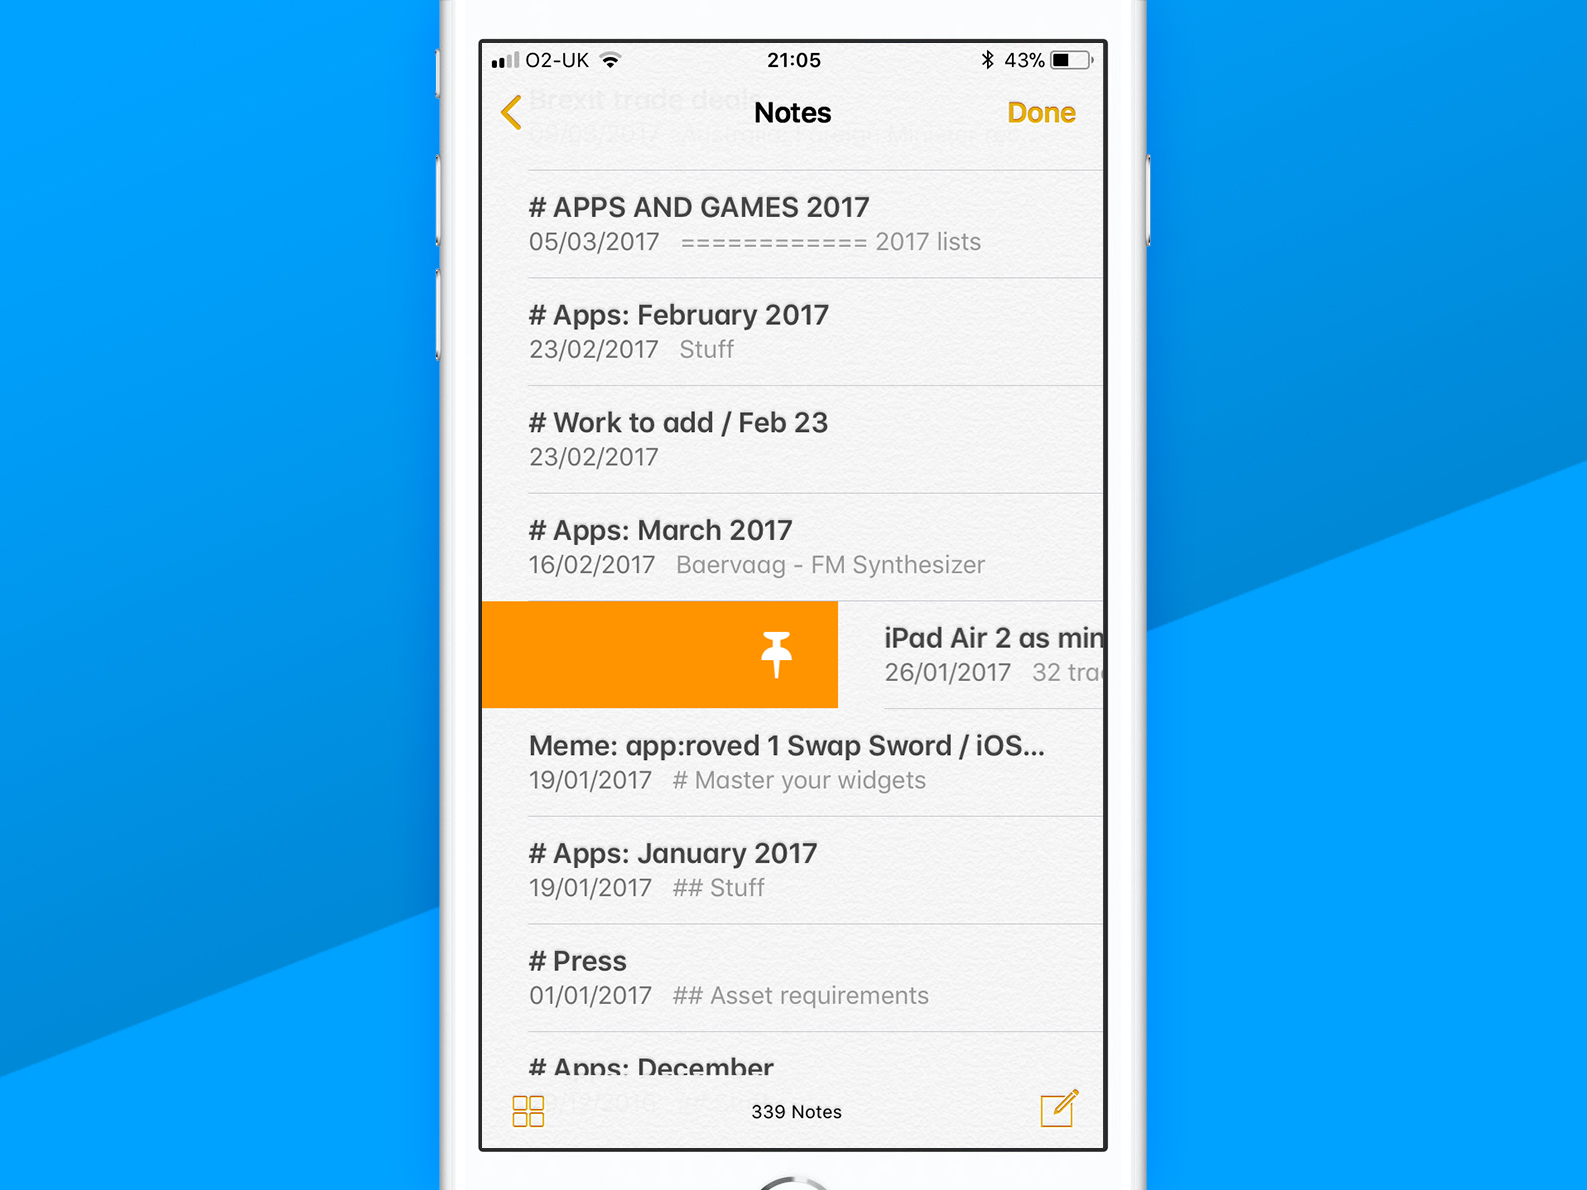
For reasons us mere mortals may never understand, Apple has still decided actual humans only ever need notes sorted in reverse-chronological order. However, you can now unleash your rebellious side a bit by pinning favourite notes to the top of the list – just swipe across them from the left.
The Notes app also has another trick up its sleeve: tables. This is not Excel, but is enough for laying out the odd bit of data in columns and rows, or adding a load of rectangles to notes because you like them. You weirdo.
10) Scan papers
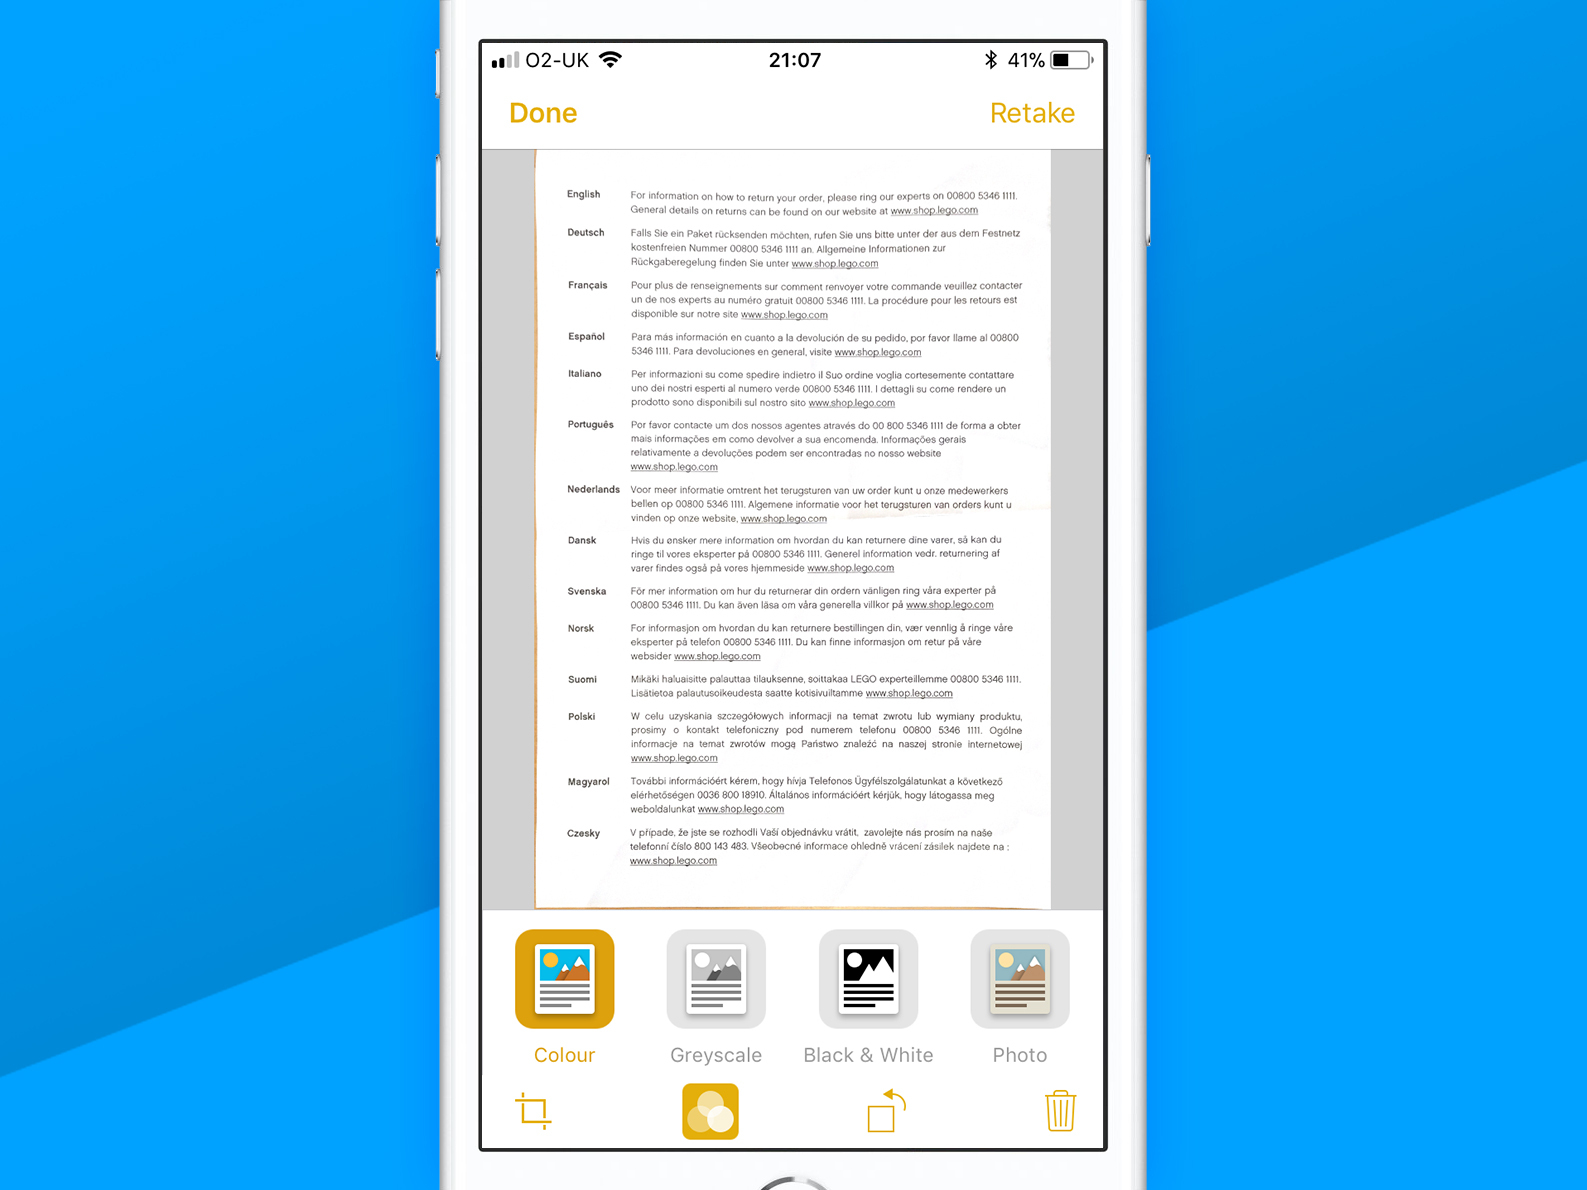
We remember our first scanner. It was roughly the size of a table. But on iPhone, all you need is to install an app. Now, in iOS 11, you needn’t even do that – just fire up Notes, tap the + button, and choose Scan Documents.
As long as there’s enough contrast between your paper and what it’s sitting on, Notes will snap and crop it automatically. You can keep shooting until you run out of documents and/or people beg you to stop. At that point, tap your scanned document to fiddle with its crop, filter, and rotation. Tap Save to embed the result in your note.
11) Type faster
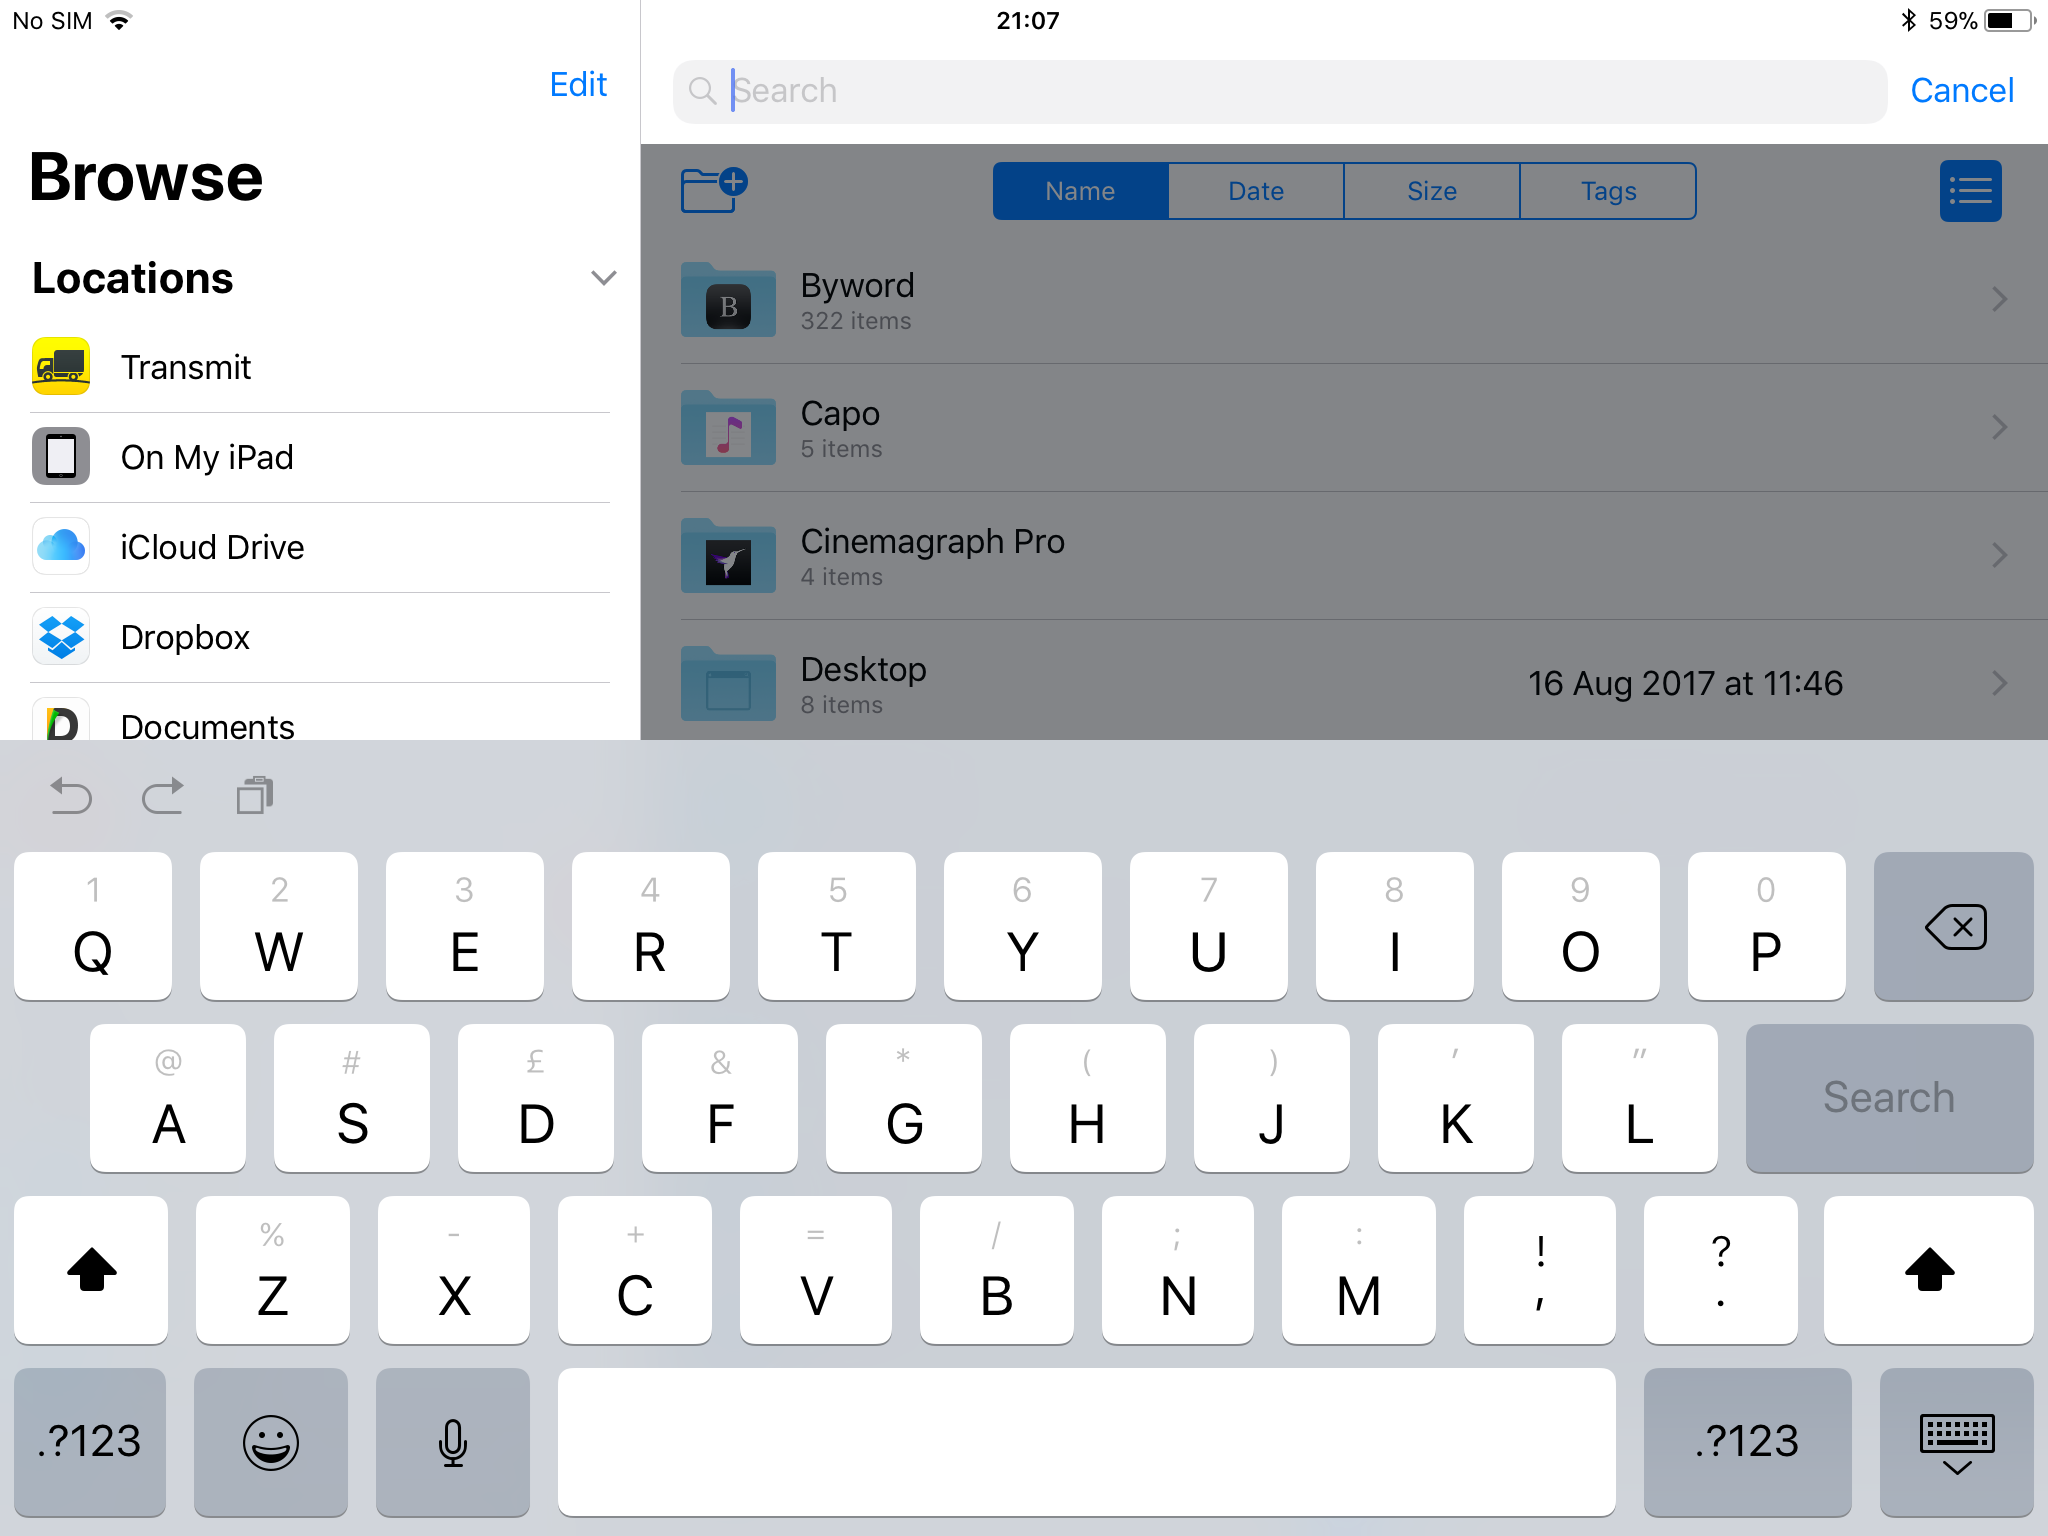
Whether you’re armed with an iPad or an iPhone, iOS 11 wants to make typing easier for you. On iPad, this is very obvious – little grey characters sit on each key, such as # on s. These are accessed by swiping downwards over the keys. Easy.
On iPhone, you get something rather different: the means to squish the keyboard left or right – useful for anyone not blessed with banana thumbs for one-handed typing. To get this working, you’ll in Settings need to go to General > Keyboard and ensure at least two keyboards are active (your chosen language and Emoji are the two defaults). Tap-hold the emoji key and press the buttons to adjust the keyboard.
12) Find auto-brightness
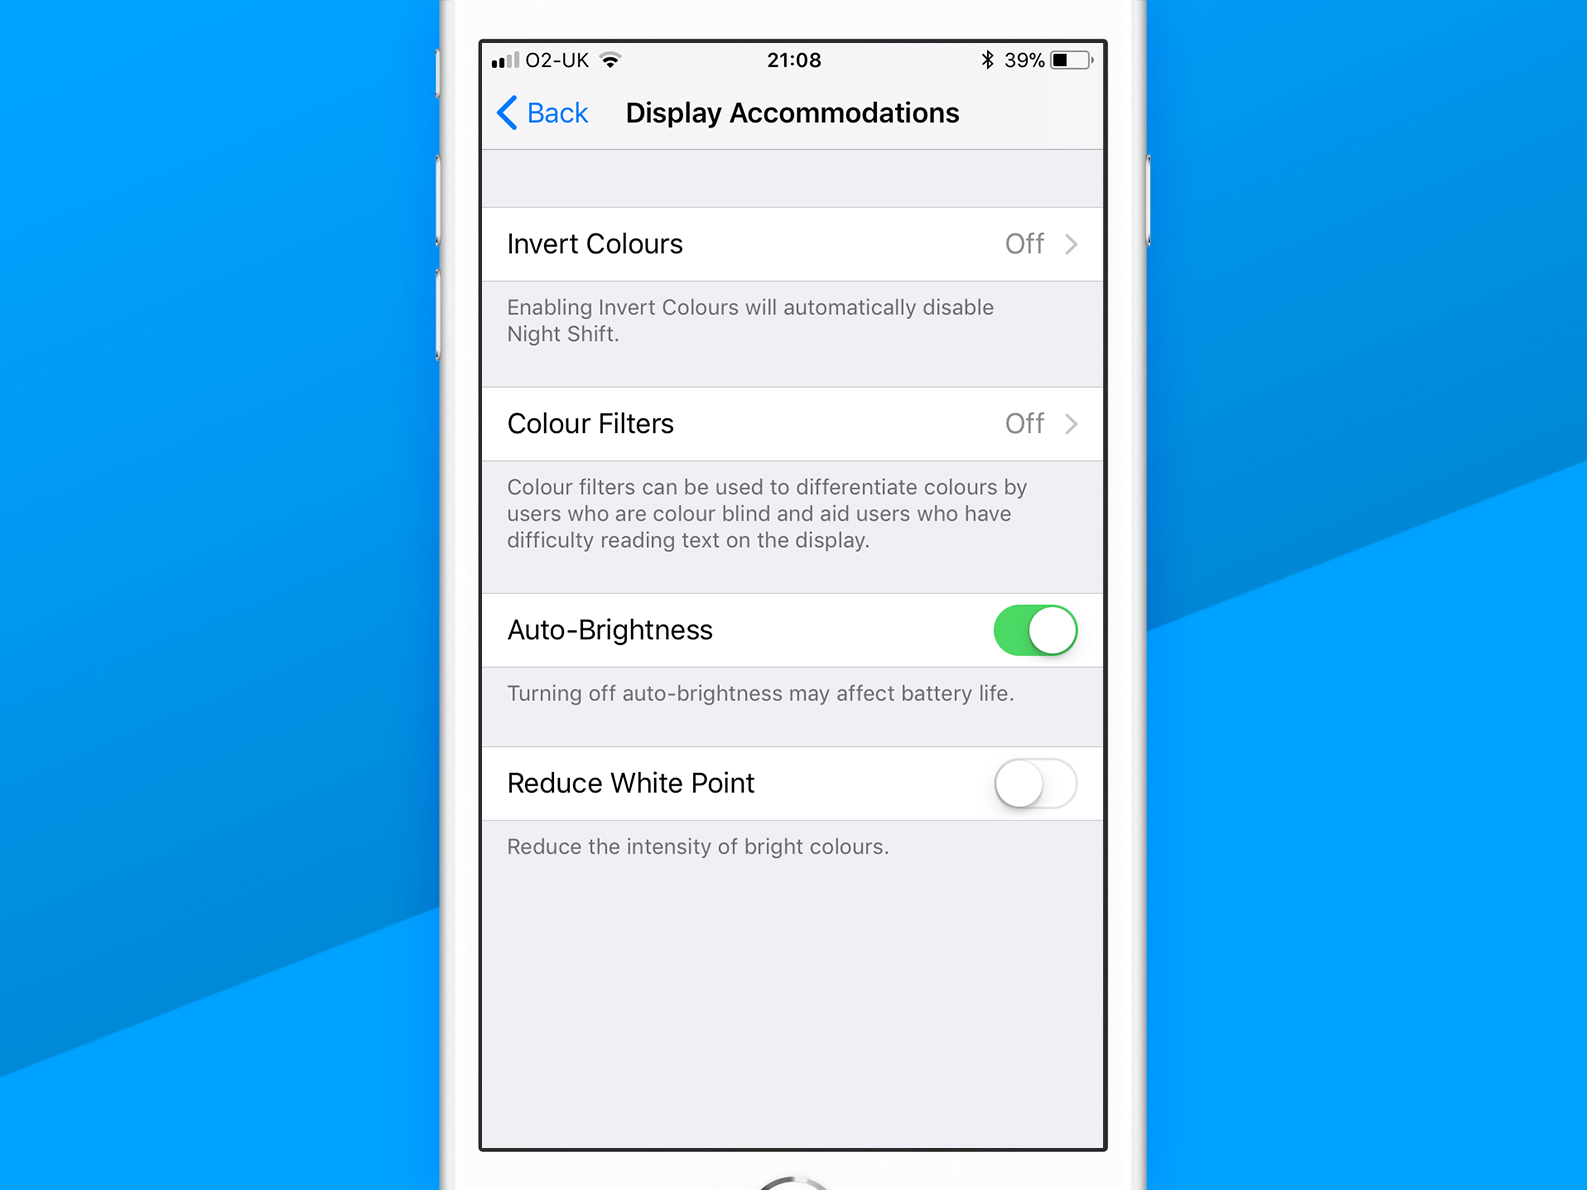
Apple has decided you need auto-brightness on at all times, and it doesn’t care what you think about that. Want to switch auto-brightness off from Control Centre? Tough. The option has gone. Nothing to see here.
But wait! A switch still exists. In Settings, go to General > Accessibility > Display Accommodations > Cellar > Locked Filing Cabinet > Disused Lavatory > Beware of the Leopard > Auto-Brightness. (We may have made some of that path up. But then we’re also baffled why Apple’s made this one so difficult.)
13) Reduce motion
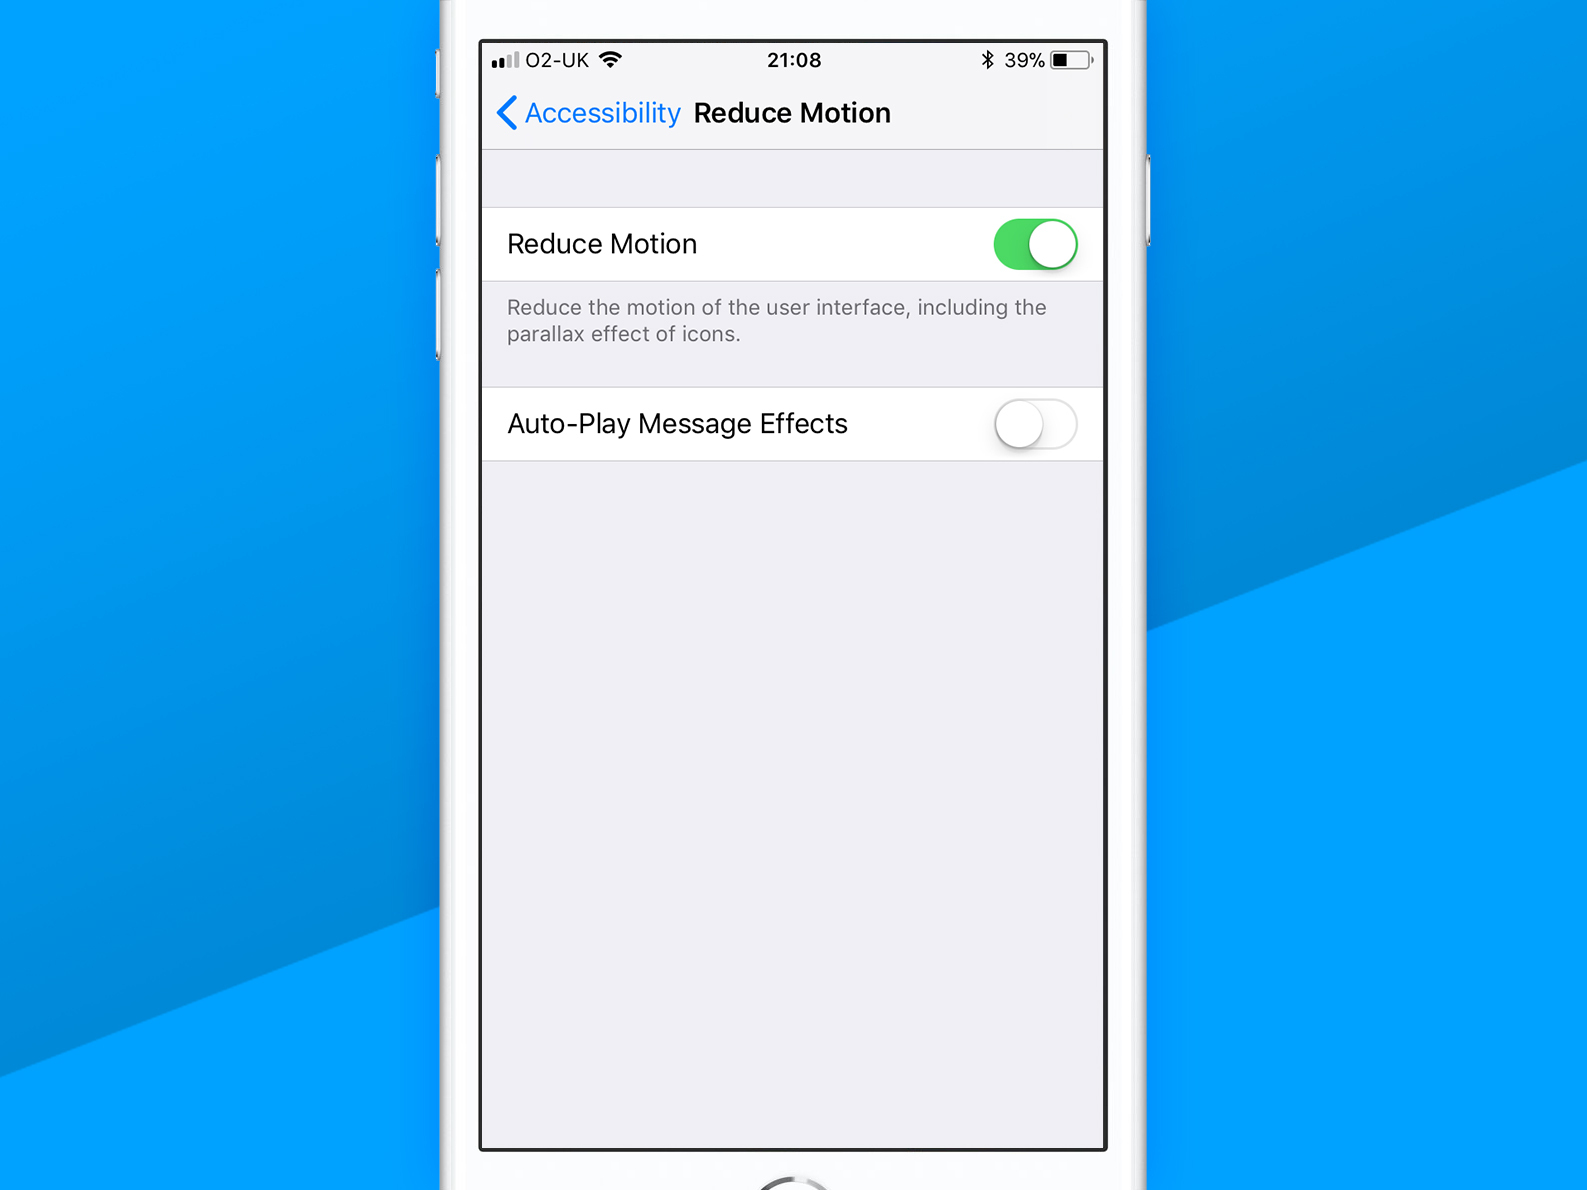
OK, so this tip isn’t about a new feature per se, but it does enable you to deal with some of the new animations iOS 11 hurls at your eyes.
As we reported years ago, iOS’s whizzy stuff is great for some folks, but makes others sick – and we’re hearing people never before affected by motion sickness are now succumbing. If that’s you, turn on Reduce Motion in the Accessibility section of Settings – although be mindful it doesn’t still all animations. App Store and Photos in particular remain brain-punchingly wooze-inducing.
14) Edit Live Photos
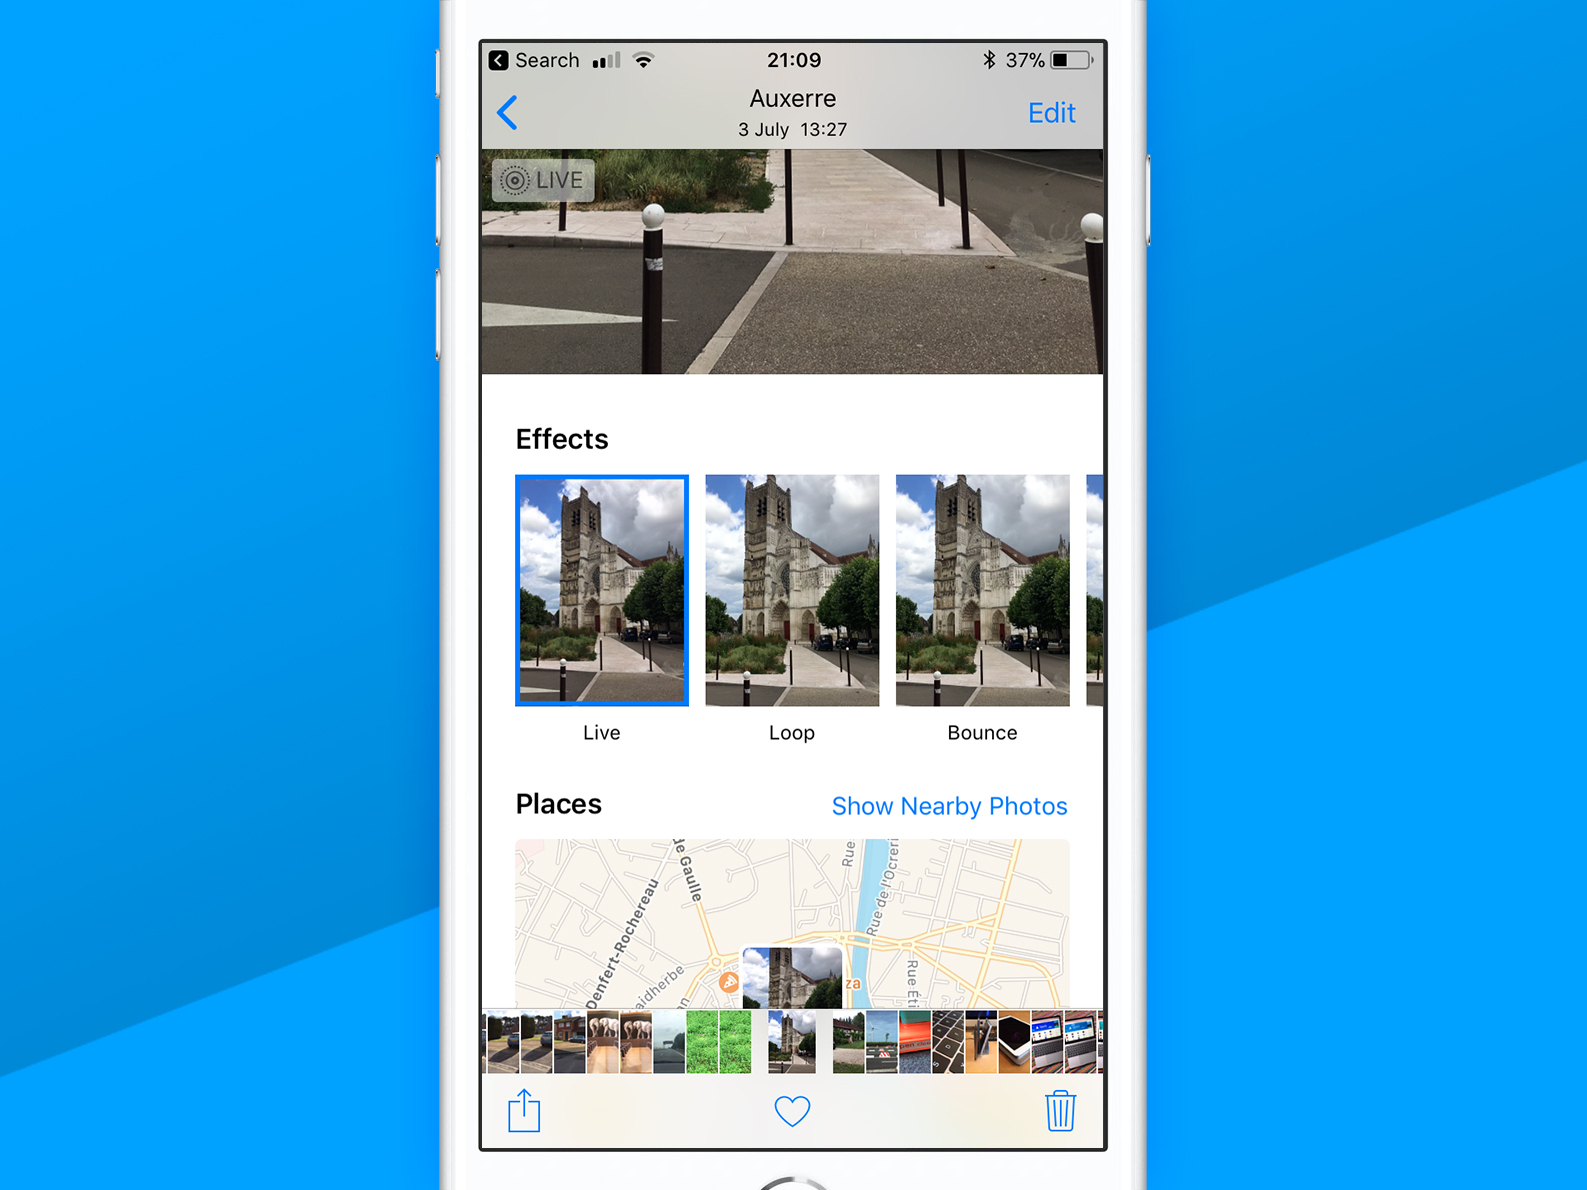
Ironically, it took Google (through its excellent Motion Stills) to make us properly see the potential in Live Photos. And although iOS 11 doesn’t match that app in all areas (no tiny movies from multiple snaps, for instance), it nonetheless provides some handy editing tools.
Select your Live Photo in Photos and tap Edit. Drag the timeline left or right edges to trim the video component, then tap a spot within the timeline and Make Key Photo to change the still. When in the standard view, drag the Live Photo upwards and you can select a new effect: Loop, Bounce, or (a faked) Long Exposure.
15) Annotate grabs
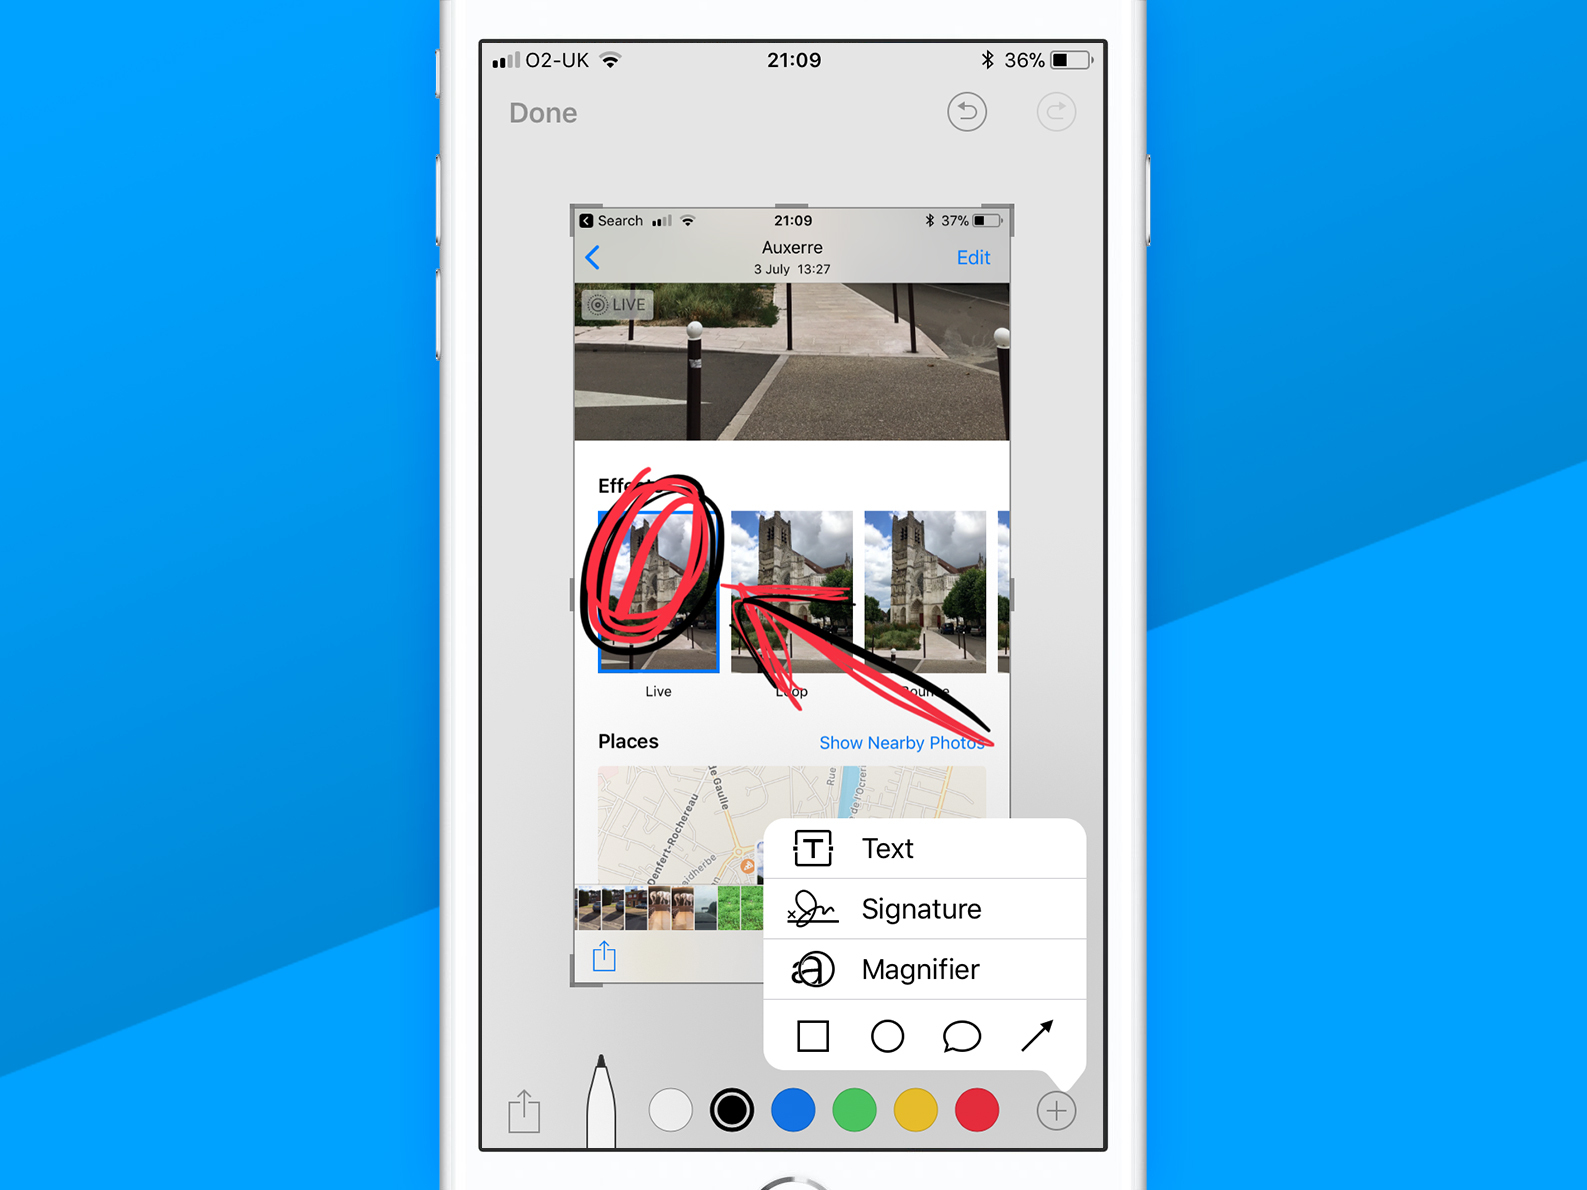
As in previous versions of iOS, you press Home and Sleep to take a screen grab, so you can subject online friends to the horrors of your Home screen, or angrily post a grab of a news article to Twitter. Now, you can madly scribble all over such things, too.
Tap the thumbnail when it lurks at the corner of the screen, and then crop your screen grab, draw on it, and add text – or sign it, if you’ve somehow found a way to make money from autographing your online detritus.
16) Record your screen
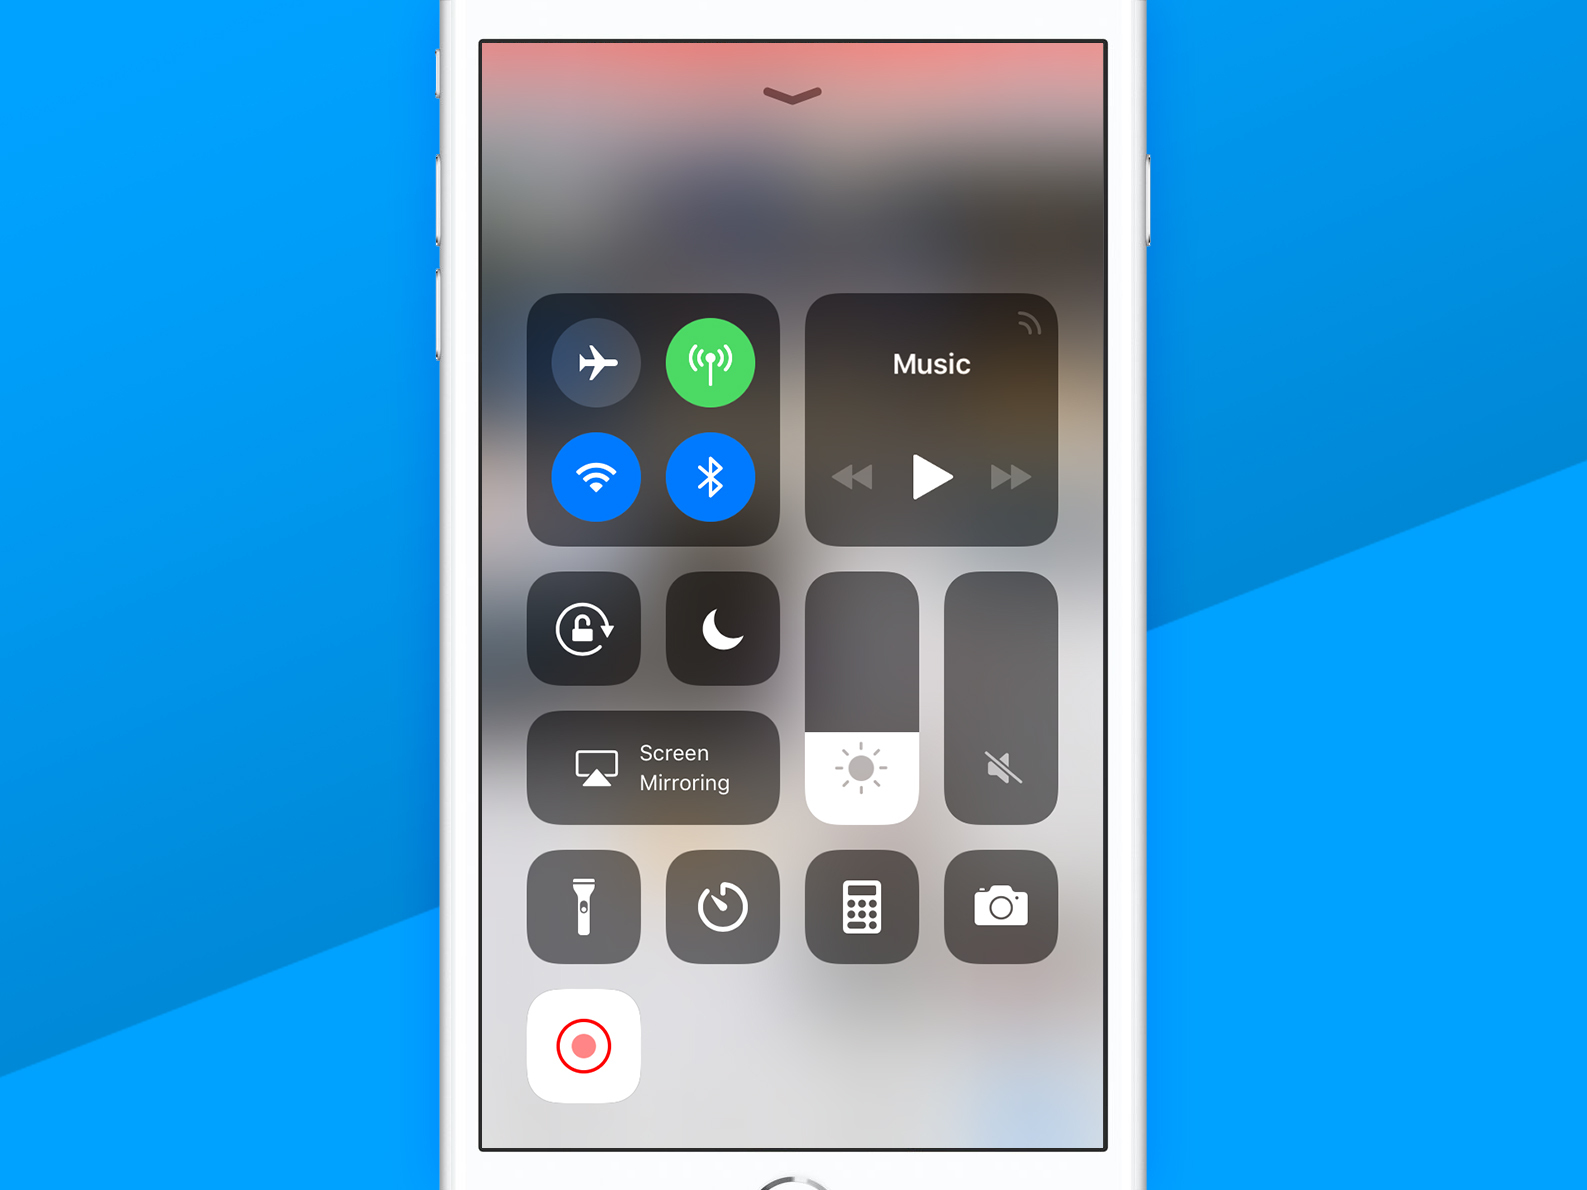
We earlier mentioned Control Centre customisation, and one button you can add is used to trigger screen recording. So if you can complete Threes! in five minutes, or want to show off amazing thumb-drumming in GarageBand, add the button, and get a recording going by prodding it in Control Centre.
You’ll get a countdown, and the status bar will go red. When you’re done, tap the bar, press Stop, and fish the video out of Photos. It can be edited, trimmed and shared in the usual manner. Fame awaits. Possibly.


