How to get and test iOS 9 before everyone else in 5 easy steps
Run the public beta of iOS 9 to enjoy its new features and improve the experience simultaneously
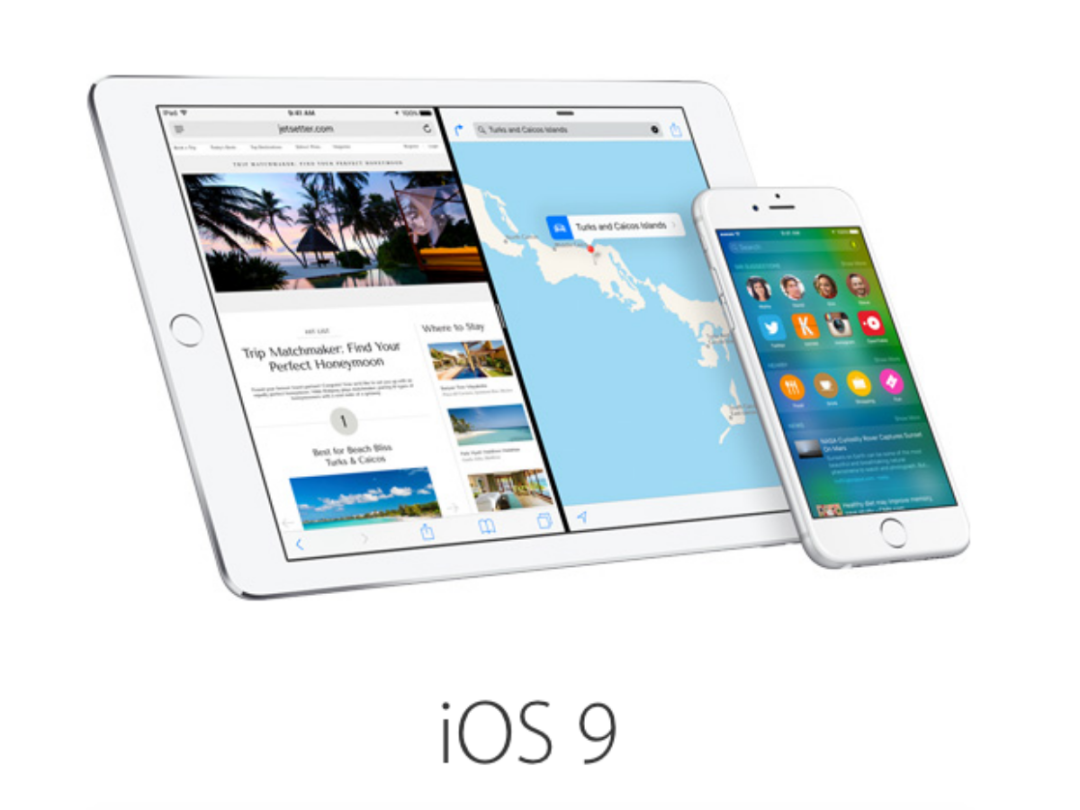
You don’t have to wait until September to get iOS 9. The public beta is out now for testing and feedback purposes.
Word of warning though: as this is a beta version, it’s not the most stable. In fact, Apple itself recommends that you install this on a secondary device. Read: a spare phone lying around, or one without all your important business contacts. So proceed with caution.
The main purpose of Apple making the beta open to the public is to get feedback. And if you do download the beta update, a Feedback Assistant app will appear on the second page of your Home screen. Should the public beta of iOS 9 start acting up, there’s where you’ll go to log your report.
Step 1: Sign up for the Apple Beta Software Program
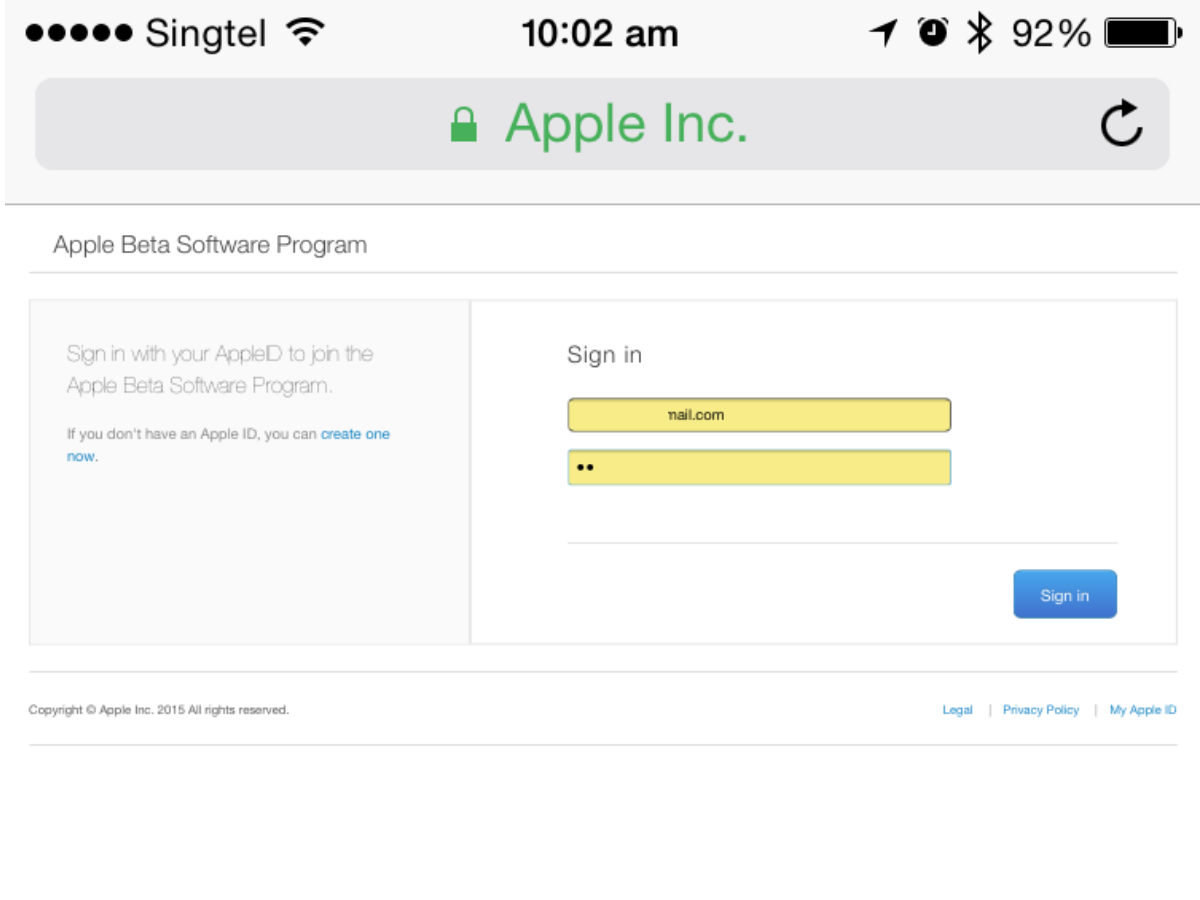
You’ll have to sign up for the Apple Beta Software Program to be counted. Thankfully, it’s a simple enough process. Just head over to this page and sign in with your Apple ID, read and accept the Apple Beta Software Program Agreement, and you’re in.
Lucky for you, there’s no hazing ritual of any sort to prove your undying devotion to Tim Cook. Phew.
Step 2: Back up your iThing to iTunes, not iCloud
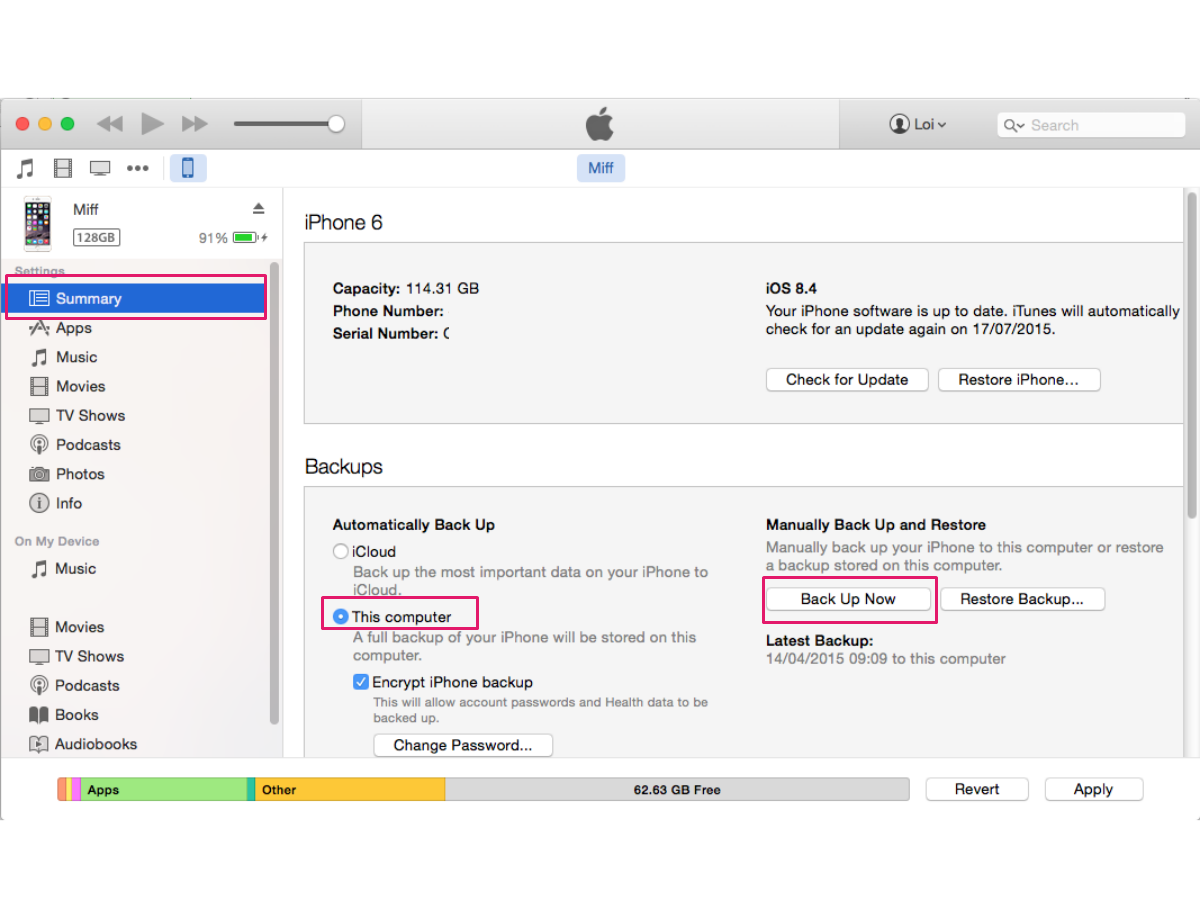
When you’re done with the simple sign-up, prep your iThing for the software facelift by backing it up. We cannot emphasize this enough. Do this so that you don’t lose any of your precious data should iOS 9 go rogue. Also, back up your iThing to iTunes and not iCloud, because the latter won’t let you restore from it fully if you return to iOS 8.
As usual, plug your iThing in, boot up iTunes. Click on Summary, then Back Up Now, and let iTunes do the rest of the work for you. You can use this time to read through all the exciting things that iOS 9 has in store for you.
Step 3: Archive your backup
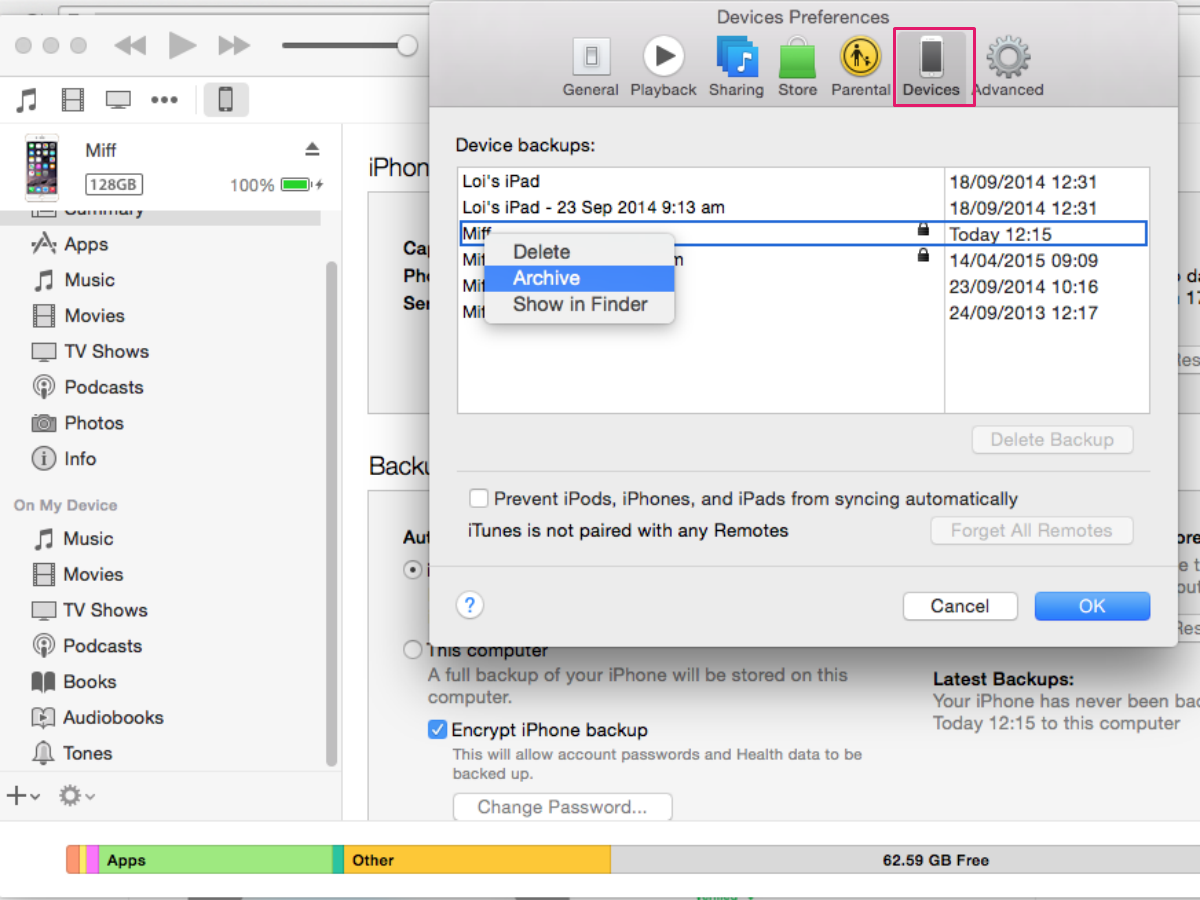
When you’re done with the backup, you’ll want to archive it. Why? Because just like backing up to iTunes and not iCloud, it will allow you to restore your device to iOS 8 if iOS 9 doesn’t work out for you. So repeat after us, back up to iTunes, then archive backup.
Here’s how: in iTunes, go to Preferences, then Devices. Find your backup, right-click and select Archive to save it should you need to go back to iOS 8.
Step 4: Download Profile
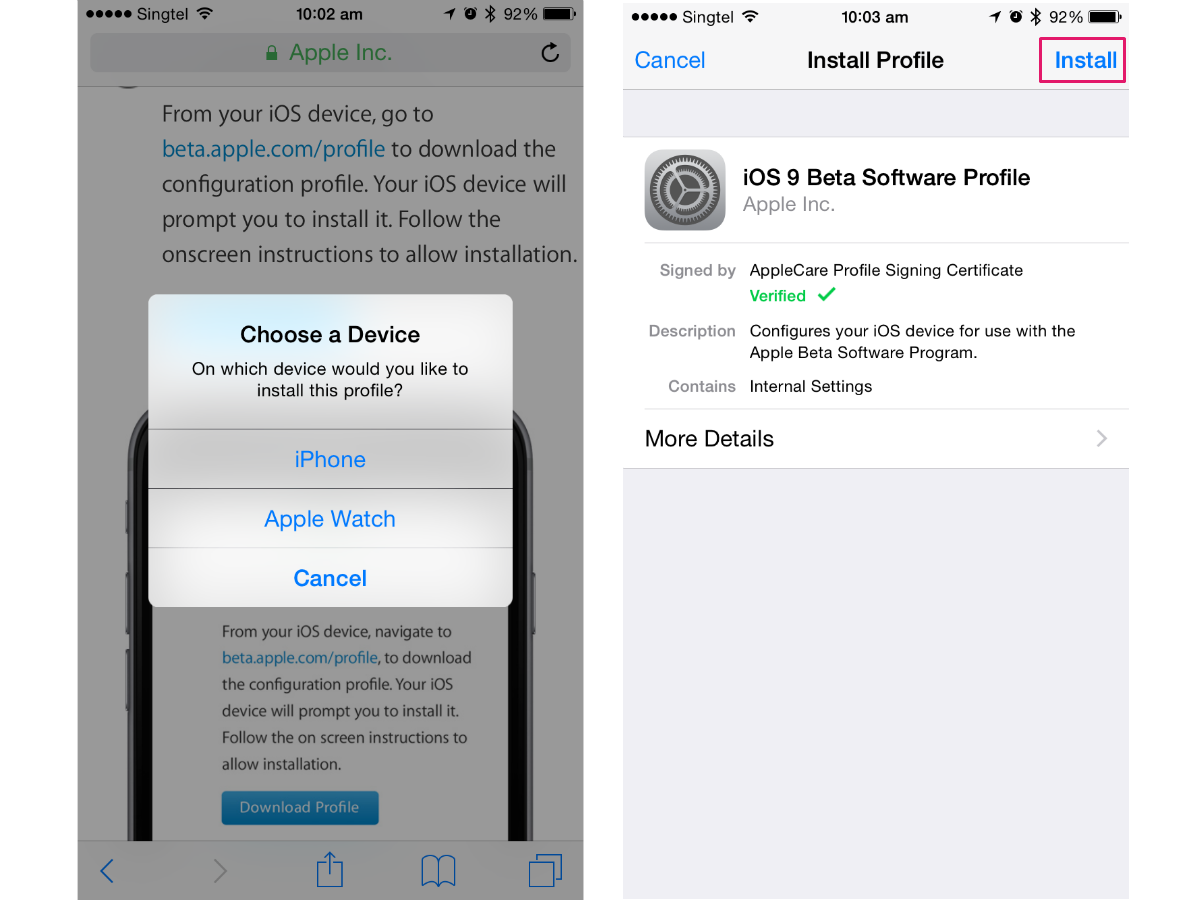
Go to this link (beta.apple.com/profile) on the iThing you want iOS 9 to be installed on (whether it’s your iPad or your iPhone) and follow the instructions.
Here’s the breakdown of the process for you: you’ll be asked to sign in with your Apple ID, click on Download Profile, then you’ll be prompted to Choose a Device, Install Profile to configure your iThing to work proper for iOS 9, and then prompted to restart your iThing for the settings to kick in.
Step 5: Install update
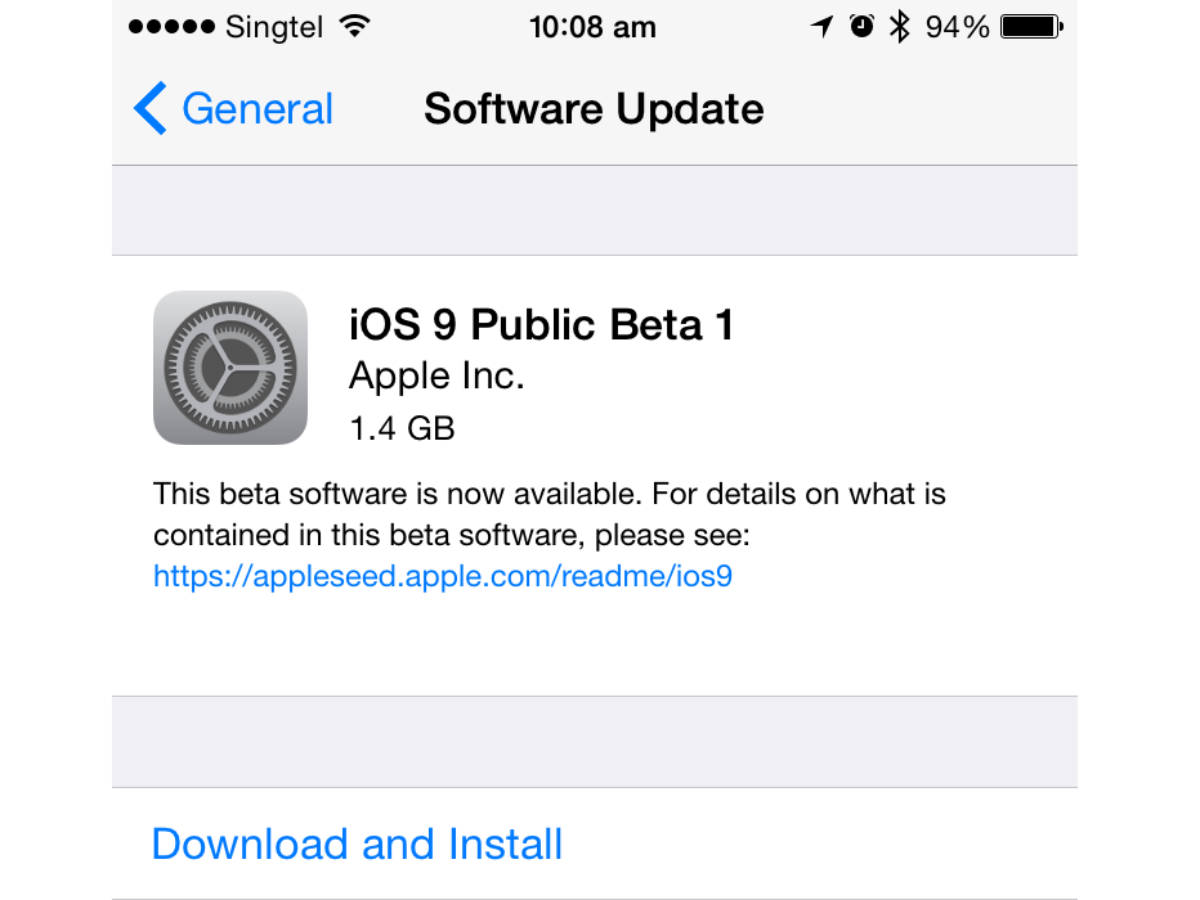
iOS devices running iOS 8.1.3 or later will automatically receive the public data software over the air. Just head over to Settings, then General and Software Update to to find the public beta of iOS 9 nestled within. Do note that it’s 1.4 GB in size, so make sure you have that much available space before you download and install it.
Happy iOS 9-ing! Don’t forget to check in with the Feedback Assistant app should you encounter any issues. The future of iOS 9 depends on you.


