So you just got AirPods Pro: the first things to do with your Apple wireless earphones
How to make the most of your high-tech headphones

AirPods have been sought-after stocking fodder since their debut in 2016 – and the AirPods Pro (2nd gen) only step things up.
The premium ‘Pods take all that’s great about Apple’s wireless in-ears (including quick-paring with an iPhone) and add impressive noise-cancellation, as well as Transparency – a mode that lets you hear the world around you, even when you’ve got lugholes full of ’buds.
Just unwrapped a set of AirPods Pro? Your ears are in for a treat, but there are also a few things to know before you fire up your favourite playlist. The list below features our top tips and tricks to help you set up your AirPods Pro perfectly. We’ve also included a few things to do, download and buy to make sure you’re making the most of your ‘phones.
Top of the ‘Pods
Picking a pair of AirPods is trickier than it seems. In addition to the AirPods Max, Apple now has three pairs of wireless ‘buds to choose from: the AirPods Pro (2nd generation), the AirPods (3rd generation) and the AirPods (2nd generation) from 2019. And there are some distinct differences between each of those models. Not which set is best for you? Check out our dedicated guides: AirPods Pro vs AirPods 3 vs AirPods 2, or Apple AirPods Pro 2 vs AirPods Pro.
1) Connect them to your device
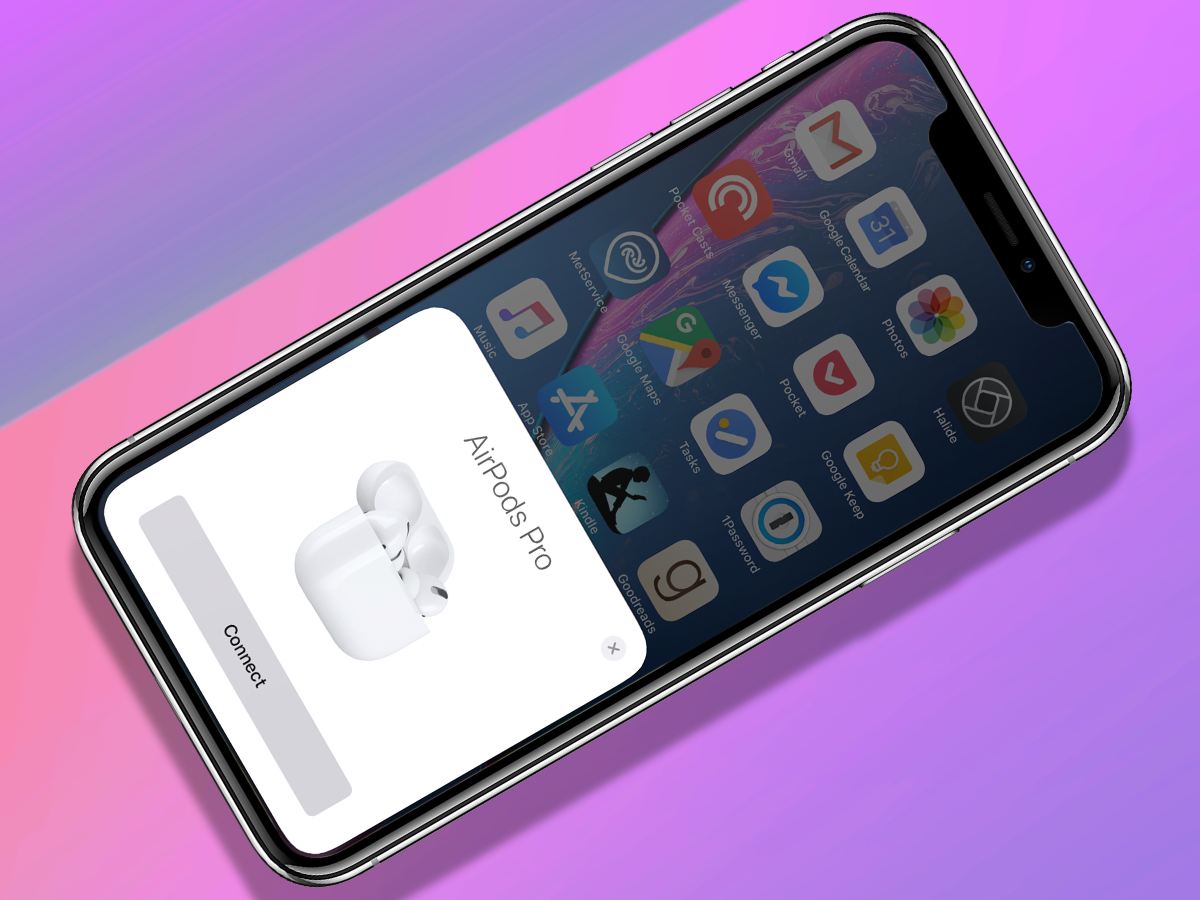
You can use AirPods Pro with an Android device – or any device with Bluetooth connectivity – but setup is a much more seamless experience with an iPhone or iPad.
Simply unwrap your AirPods Pro, then flip open the charging case near your iOS device with its screen on. You should see a graphic pop up in a jiffy – simply tap to connect. You’ll be shown a short tutorial on the AirPods Pro’s features and how to use them, then you’ll see the AirPods named as yours. And that’s it: you’re ready to listen.
If you’re not using an Apple device, the process is a bit different. While your AirPods are in the charging case, you’ll need to open its lid and press and hold the setup button on the back. Wait for the LED light to flash white, then the AirPods should appear in your device’s Bluetooth menu. You then just tap to pair. But keep in mind: the advanced features mentioned in tips two and three below will only work with an iPhone or iPad.
Seamless switching
Also own a Mac device? If it’s using the same iCloud account as your iPhone or iPad, your AirPods should appear instantly in your Mac’s Bluetooth device list. What’s more, provided you’ve signed in with two-factor authentication, audio will automatically switch between all of your iDevices. So if you’re listening to Spotify on your Mac and someone calls you on your iPhone, you should be able to switch over seamlessly, simply by answering the phone.
• Going pro: Apple AirPods Pro review
2) Take the fit test
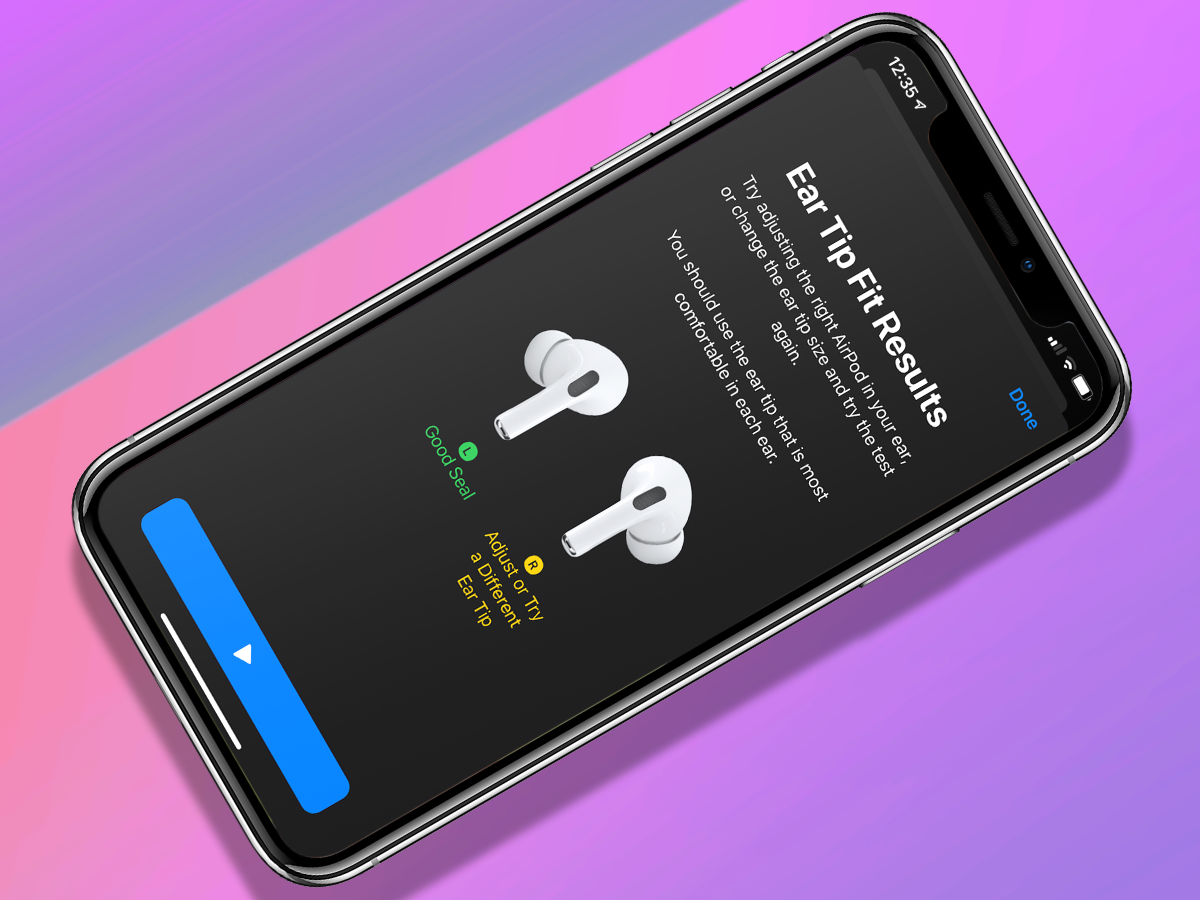
The main design difference between the older AirPods and your AirPods Pro is the in-ear design. They ship with medium tips attached, with small and large alternatives included in the box. It’s important to ensure you’ve got a good fit, both for the best sound quality and to take advantage of the Pro’s clever sound modes.
Luckily, Apple’s here to help. Put the AirPods Pro in your ears, then open the Settings menu on your iPhone or iPad. Tap ‘Bluetooth’, then tap the blue ‘i’ icon next to the AirPods Pro (which should show as ‘Connected’).
This will take you to the AirPods Pro settings menu. From there, tap ‘Ear Tip Fit Test’. As the next screen will tell you, this short process helps you find a good fit and seal with the AirPods in your ears. Tap ‘Continue’ at the bottom of the screen, then the blue play bar at the bottom to start the test. A short piece of music will play, then hopefully each earbud graphic will report ‘Good Seal’ in green.
If you get a yellow result for one or both ears that says ‘Adjust or Try a Different Ear Tip’ then something needs to change. First, try wiggling the AirPods Pro or pushing them in a little bit further – but be careful: don’t force it or risk damaging your delicate inner ear. If you’re still not getting a good seal after adjusting the position, try swapping to an alternative tip size. Remember: you might need a different tip size for each ear. You’re unique, after all.
Once both sides are showing ‘Good Seal’, tap ‘Done’ and you’re good to go.
Clean your ears
Can’t get a good Ear Tip Fit Test result with any size? Try carefully cleaning each earbud with a lightly damp cloth. Allow them to dry fully, then repeat the test again. Whatever you do, don’t run them under the tap: AirPods Pro are not waterproof (although they are water-resistant).
• Not a fan? Here are 20 of the best Apple AirPods alternatives
3) Explore the Pro sound modes
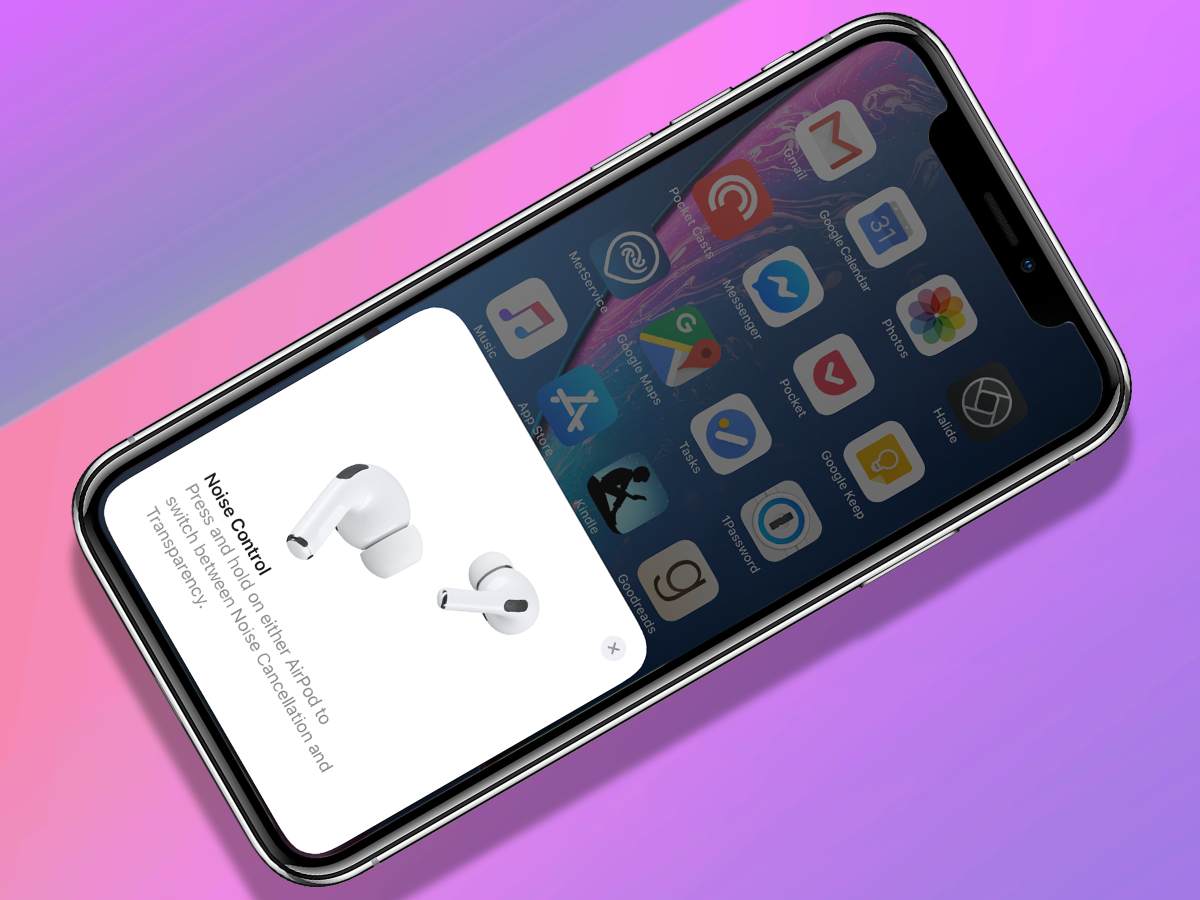
Using built-in microphones, the AirPods Pro can listen to the sound around you. If they pick up background noise, the AirPods Pro will play opposite frequencies to cancel it out. Think of them as high-tech earplugs. You’ll hear less ambient noise for a purer listening experience, whether you’re enjoying music, audiobooks or podcasts – ideal for loud situations like trains, planes and city streets.
On your iPhone or iPad, head to the Settings menu, then tap ‘Bluetooth’ and the little blue ‘i’ icon next to your connected AirPods Pro. Tap ‘Noise Cancellation’ and you’ll be able to enable or disable the setting. To test out just how effective it is, try playing some music on your iPhone then switching Noise Cancellation on and off. You should notice a significant difference, particularly if you’re out and about.
That same menu is also where you can find and enable the AirPods Pro’s ‘Transparency’ mode. As the name suggests, this allows the sounds around you in. Why would you undo all of your AirPods’ noise-cancelling efforts? Because sometimes you need to be aware of the world around you – when you’re crossing roads, driving or just walking down the street while on a phone call. And if you pause your audio, Transparency mode means you can talk to people without taking off your AirPods. A bit rude, but it works.
Pinch to pause
The AirPods Pro have touch-sensitive stems that you pinch to use. One pinch will pause your audio, another will play. Pinch and hold the force sensor to cycle through Noise Cancellation, Transparency and Off. Too many modes? Head to the same AirPods settings menu as above and under the ‘Press and hold AirPods’ section you can select whether pinching swaps between two or three modes. Android users can still use media controls and switch sound settings but can’t customise anything.
4) Stream some tunes
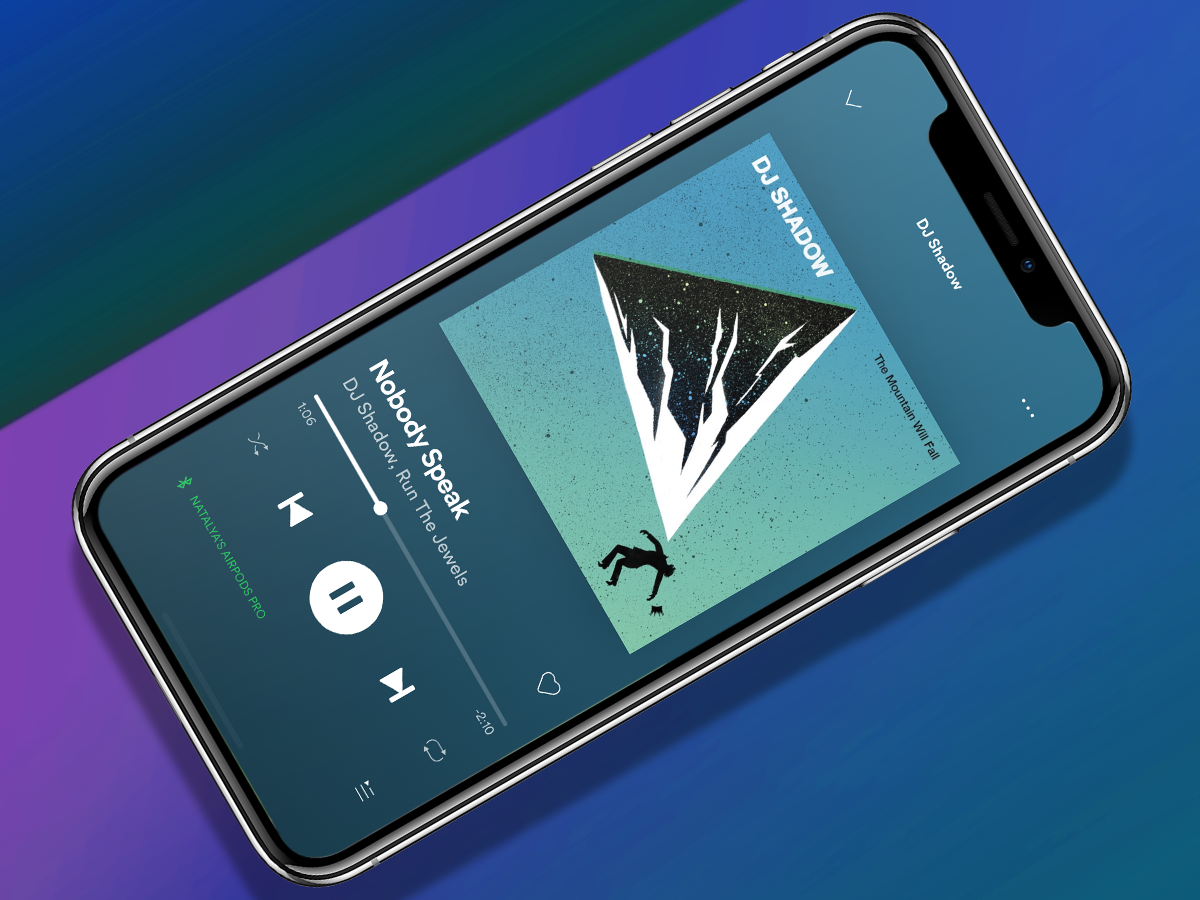
What’s the point of AirPods if you haven’t got something to play? You might already have an iTunes library loaded onto your phone, but if you’re short of songs, try a free trial of either Apple Music or Spotify.
We prefer Spotify for its clever music recommendation algorithms, superior UI and expansive catalogue of music. You can download the Spotify app for free (on iPhone or Android) and sign up for a three-month free trial of ad-free Premium. You need to add your payment details, but make a note to cancel your membership before the first instalment and you won’t pay a penny. The trial will give you access to basically all music ever, plus most podcasts.
You can do the same on Apple Music (also available for Android), which you might prefer if you live in Apple’s ecosystem. It does pretty much everything Spotify can do. More importantly, it can make the most of your AirPod Pro’s spatial audio support. With dynamic head-tracking, this tech immerses your noggin in a soundscape that feels like it’s coming from all around.
Apple Music subscribers can choose to hear songs in spatial audio with Dolby Atmos. Head to your iPhone or iPad’s Settings menu, then tap ‘Music’. Under Audio, select ‘Dolby Atmos’, then ‘Automatic’. With your AirPods Pro connected, supported songs will automatically play in Dolby Atmos.
To get started, simply open the Music app on your iPhone and it’ll steer you towards a free three-month trial. Your iPhone already has Apple’s Podcasts app on it, too.
Spatial TV streaming
Got an Apple TV below your box? You can also use your AirPods Pro to get spatial audio while you stream certain shows. On your TV, go to ‘Settings’, ‘Remotes and Devices’, then ‘Bluetooth’. Select your AirPods Pro from the list, then choose ‘Spatial Audio’ while you’re playing multi-channel content. You can also opt to ‘Spatialize Stereo’ for a similar effect from standard two-channel audio.
• Sweet streams: the best music streaming services – reviewed
5) Accessorise your AirPods
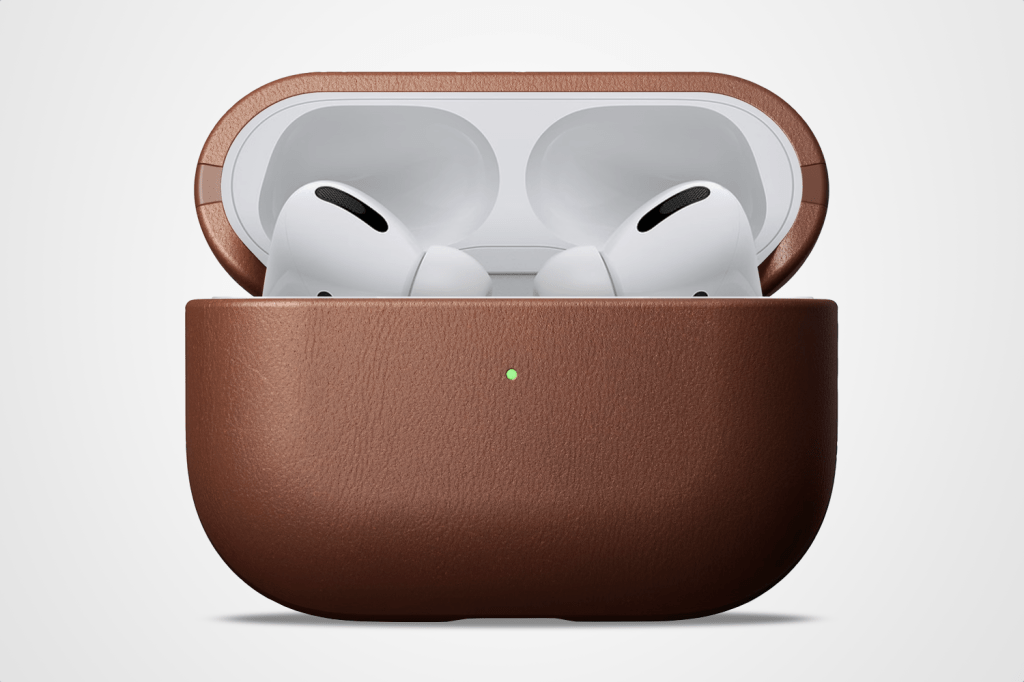
Buying an accessory for an accessory might seem like the path to endless purchases, but upgrading your AirPods Pro’s MagSafe Charging Case can hugely improve your listening experience.
Your charging case carries your AirPods Pro with aplomb, but what’s there to shield the case itself? From silicone skins to leather shells, the best AirPods Pro cases will add extra protection and improve the look of your AirPods packaging. We’ve picked out a handful of our favourites below.
Nomad Modern Leather Case
Looking for premium AirPods protection? Skins don’t come slicker than this Horween shell from Nomad. Crafted from vegetable-tanned leather, the case will take on a unique patina as you use it. There’s also a handy light pipe, so you can still see the LED indicator. Buy it here
Incase AirPods Pro Case with Woolenex
You could knit yourself an AirPods Pro sleeve. Or for protection which uses less of your precious yarn, stash your charging case in this slimline Woolenex number. Lightweight and form-fitting, the fabric outer layer is weather-resistant and shields against scuffs. Buy it here
Elago AW3 AirPods Pro Case
Nothing says Apple fanatic like an AirPods Pro case styled like a miniature Macintosh. Unlike Apple’s retro computer, the case supports wireless charging. It also offers drop-protection and comes with a free dose of nostalgia. Buy it here
Spigen Tough Armor
A carabiner clip is the universal symbol of tougness, so it’s no surprise that this rugged shell from Spigen ships with one. Clad your AirPods Pro charging case in the chunky rubberised cover, clip it to your backpack or belt loop, and it should be safe from bashes and scratches. Buy it here
• Need to know: 8 amazing Apple AirPods tips and tricks
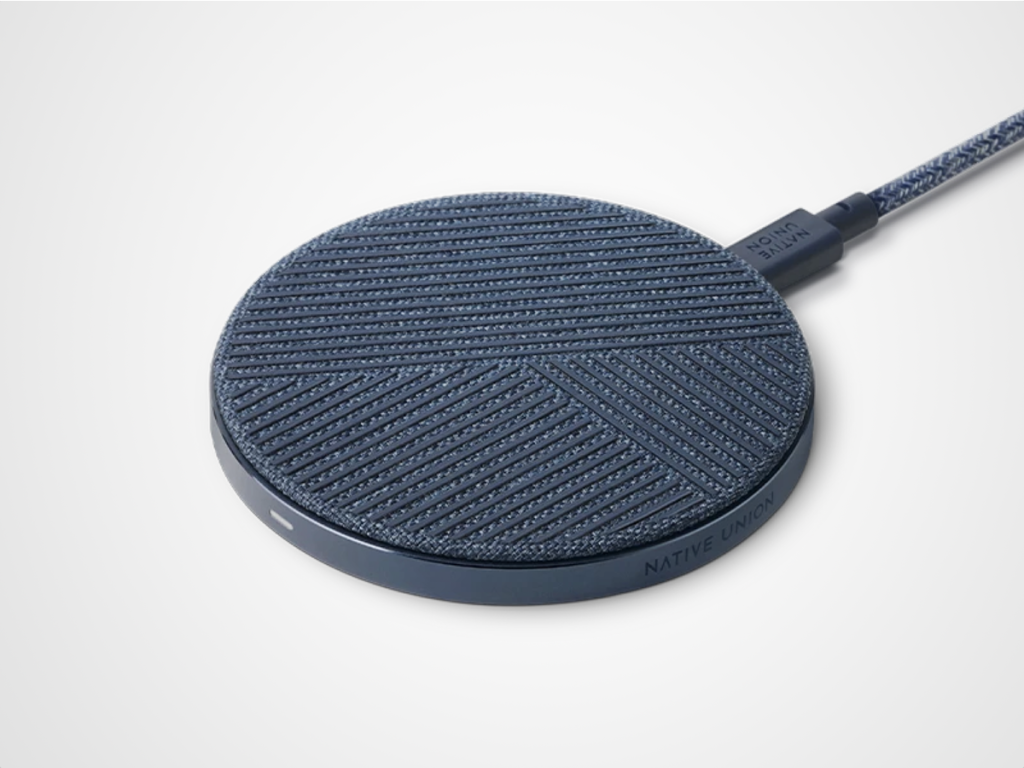
Apple’s capsule can add around 20 hours of extra time to your AirPods Pro – but only if you keep the case itself fully charged. Luckily, you only need to drop the booster on a Qi-compatible pad and it’ll refuel without any wires.
Native Union Drop
Drop your AirPods Pro case on this little disc for easy 5W recharging. Topped by textured fabric, its weighty aluminium base keeps things firmly in place, while foreign object detection prevents shorts circuits. Buy it here
Belkin Boost Charge Pro
This three-way charger can refill a trio of Apple devices. Attach your iPhone 12 or 13 magnetically to the bigger disc, drape your Watch over the dinkier one, the drop your AirPods case on the base for a fully-charged ensemble. Buy it here
• Drop and flow: the best wireless chargers you can buy

